Welcome! If you have clicked over from my post Professional Photographers’ Secrets For Amazing Family Pictures, you are in the right place! This is the first post in the four-part series that will teach you the essential elements for getting family pictures that you love!
The very first thing most people have to decide when they think about family pictures is when to take them! As a Certified Professional Photographer with 13 years of experience, I have some definite preferences when it comes to timing.
What time of year is best for family pictures?
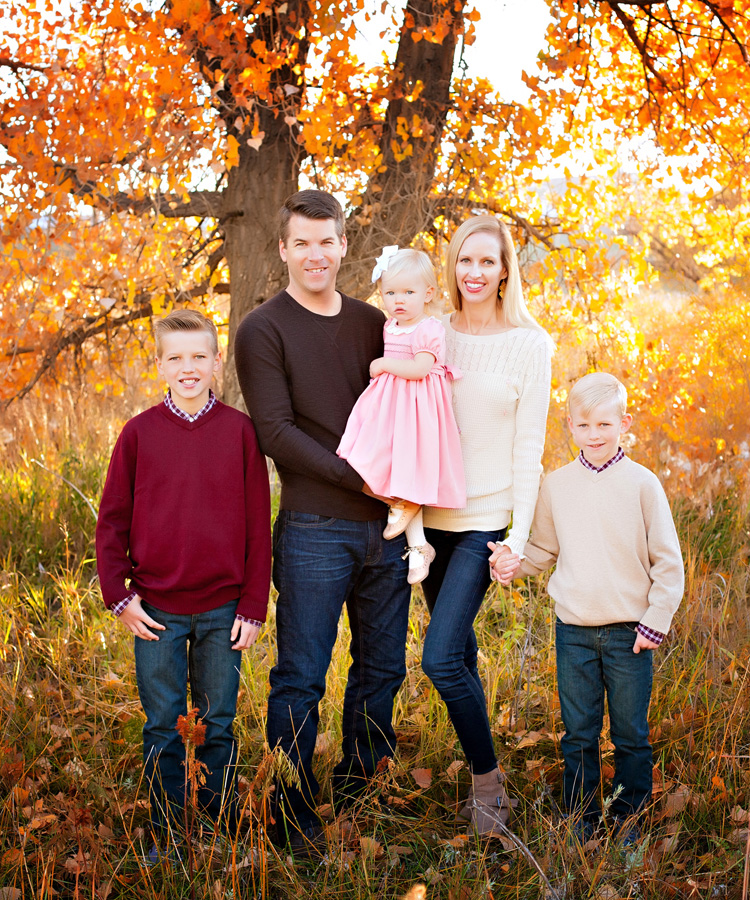
Traditionally, people start thinking about family pictures in the fall when the seasons change. It’s when you get those magical fall colors like orange and yellow. People also want to make sure to get a picture in time so they can have them ready to send out with Christmas cards.
This was taken in October at 5:30 p.m.

But the truth is, you can get great family pictures at any time of the year! Springtime is also an amazing time of year as all the flowers bloom and the trees get their leaves back.
This was taken the end of March around 6:30 p.m.

Summer (at least in the northern hemisphere) gives you the greatest amount of time to get family pictures taken, as the sun stays up later and people don’t have to hurry home from work in order to make it before you lose the light.
This was taken in June at 7:30 p.m.

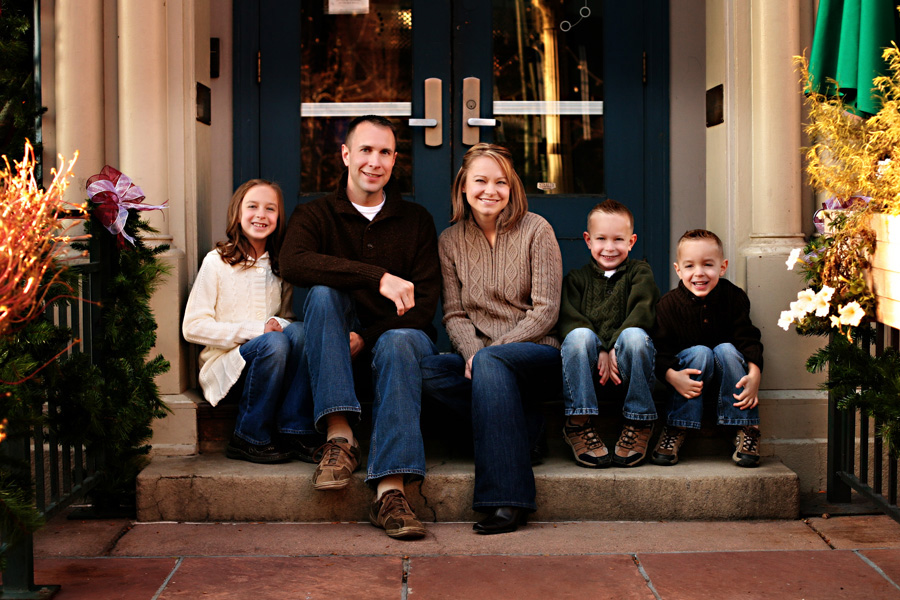
Even pictures in the winter can be fun if you wear bright clothing, or if you use buildings and bridges as backdrops rather than dead trees 🙂
This picture was taken in Downtown Denver in front of a building on a really cold November day.
This picture was taken when all the trees and grass were dead, but the people were wearing bright colors, so all the focus was on them.

This picture was taken in February. We went to a historic district with buildings that were painted fun colors.

What time of day is best for family pictures?
My favorite time of day to do family pictures is during the “golden hour,” either just before sunset, or just after sunrise. Why is it called “the golden hour?” Well, it’s because the light really is golden! When it is low in the sky, it has to pass through more layers of atmosphere. This removes some of the blue color in the light spectrum and leaves you with the beautiful yellow light that is so flattering to skin tones.
I typically try to schedule my photo sessions for two hours before sunset (I look at my weather app on my phone to see the exact time for sunset). I do this just to build in a little extra time in case the family is late or the session gets delayed for some reason. The best light actually begins about an hour and a half before sunset and lasts until about fifteen minutes before full sunset.
A couple of times, I have had to schedule sessions for just after sunrise (7:00 a.m. photo sessions are pretty early!) But the light is still soft and gorgeous.
Here is the same family with pictures taken a few years apart. The first one was taken during the golden hour in the evening. The second one was taken during the golden hour in the morning.
This picture was taken in October at 5:15 p.m., about an hour before sunset.

This one was taken in October at 8:15 a.m., about a half hour after sunrise.
Here is one of my all-time favorite pictures taken during the evening “golden hour.” Don’t you just love the way this glows? This was taken in June at 7:40 p.m.

One time, I had to do family pictures at noon, which is the absolute WORST time of day to do pictures! But it was the only time that would work for the client. I took them a large stake park and found some trees that provided some good shade (without spotty lighting). The pictures turned out beautiful, but it was much more difficult to find places with good lighting.
The picture below was taken in October at 1:00 in the afternoon.

What type of lighting is best for family pictures?
I always look for shade when I am taking pictures. But not just any shade! All types of shade are not created equal, especially when it comes to getting flattering lighting.
What you need to do is look for shade with a large open area in front of it. For example, a tree line with a big field in front of it, or a building with space in front of it. You need to have that open space to allow ambient light to reach the faces and eyes of your subjects. If you go stand in the middle of the forest, sure, there is shade, but not enough light reflecting off the grass or road to make a flattering picture! If you have ever taken pictures in a forest, you might have noticed that people have deep, dark pockets under their eyes, and there is typically a very blue color cast to the image.
The shade also needs to be in the right position relative to the sun, because you need to have your family stand with their BACKS to the sun. (This is not a hard and fast rule, but it is ideal and what works best for me).
Try to avoid overhead lighting, and direct light (where the sun is shining directly into your subject’s faces). Overhead lighting causes dark circles under the eyes, and direct sunlight makes people squint and is generally less-flattering than soft, diffused, indirect lighting.
Stay tuned for next week’s post all about how to pose your family!
Pin me!

Leave a Reply