Let me show you how to make this amazingly impressive, delicious, and easy Star Bread! Not just for Christmas, this beautiful bread can be made at any time of the year with a multitude of different fillings–from cinnamon to chocolate to raspberry and beyond! Keep reading for the step-by-step tutorial and recipe for Star Bread! (I’ll even show you an alternate design!)
When I saw this gorgeous bread on Pinterest, I knew I had to give it a try! I followed the recipe on The Live-In Kitchen, but made a few tweaks to the design and filling.
I made two different varieties and took them to a Christmas party, and they were a big hit! This Star Bread looks super difficult to make, but it’s actually easy and so much fun! Plus, this is a great showstopper for any special occasion! (Think baby shower, bridal shower, work party, etc!)
Let’s get to work!
Ingredients for Star Bread
The ingredients for this Star Bread recipe are probably things you already have on hand. If you don’t have whole milk, it’s o.k. (But it’s better to use whole milk, because more fat=more tenderness).
- Active dry yeast (not instant yeast)
- Granulated sugar
- Whole milk (If you don’t have whole milk, it’s o.k. But it’s better to use whole milk, because more fat=more tenderness).
- Water
- Large egg
- Butter
- Salt
- All-purpose flour
Ingredients for the Filling
There are SO many options for the filling for Star Bread! Here are some options for you:
A mix of semi-sweet chocolate with honey and butter.
Softened butter, cinnamon, and sugar.
A layer of cream cheese followed by a layer of cranberry sauce (the jelly kind, so it’s more smooth)
A layer of raspberry jam, apricot jam, or any flavor of jam you like! The darker the color, the more striking the results! You can also start with a layer of cream cheese topped by the jam.
Pumpkin pie filling.
Nutella.
Feel free to sprinkle some chopped nuts, like pistachios, pecans, or walnuts over your fillings for some extra crunch and flavor!
You can even go savory with this Star Bread Recipe!
Try using pizza sauce with small bits of pepperoni.
How about pesto and freshly-grated parmesan cheese?
Just keep in mind that whatever filling you use should have some color to it so that you can easily see the stunning design once baked!
Equipment for Star Bread
- Pizza stones, pizza pans, or large cookie sheets for baking.
- Rolling pin.
- Sharp knife or pizza cutter.
- Silicone pie mat (optional).
- Large bowl or stand mixer.
How to Make Star Bread
First, you’re going to mix up the dough (I used a stand mixer with a dough hook). The dough should be soft and slightly sticky.
Cover and let the dough rise at room temperature or in a warm place until double in size.
Once it has risen, punch it down. Now all the fun starts!
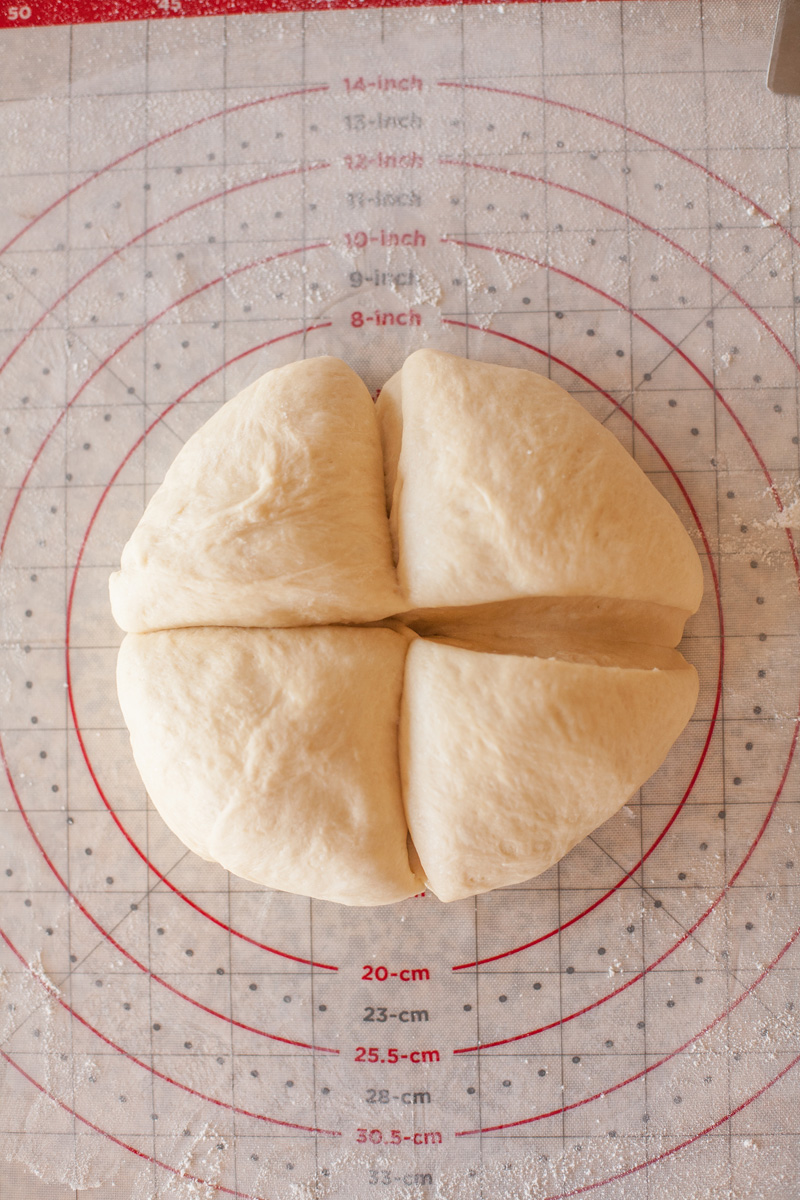
Divide your bread dough into four equal pieces.
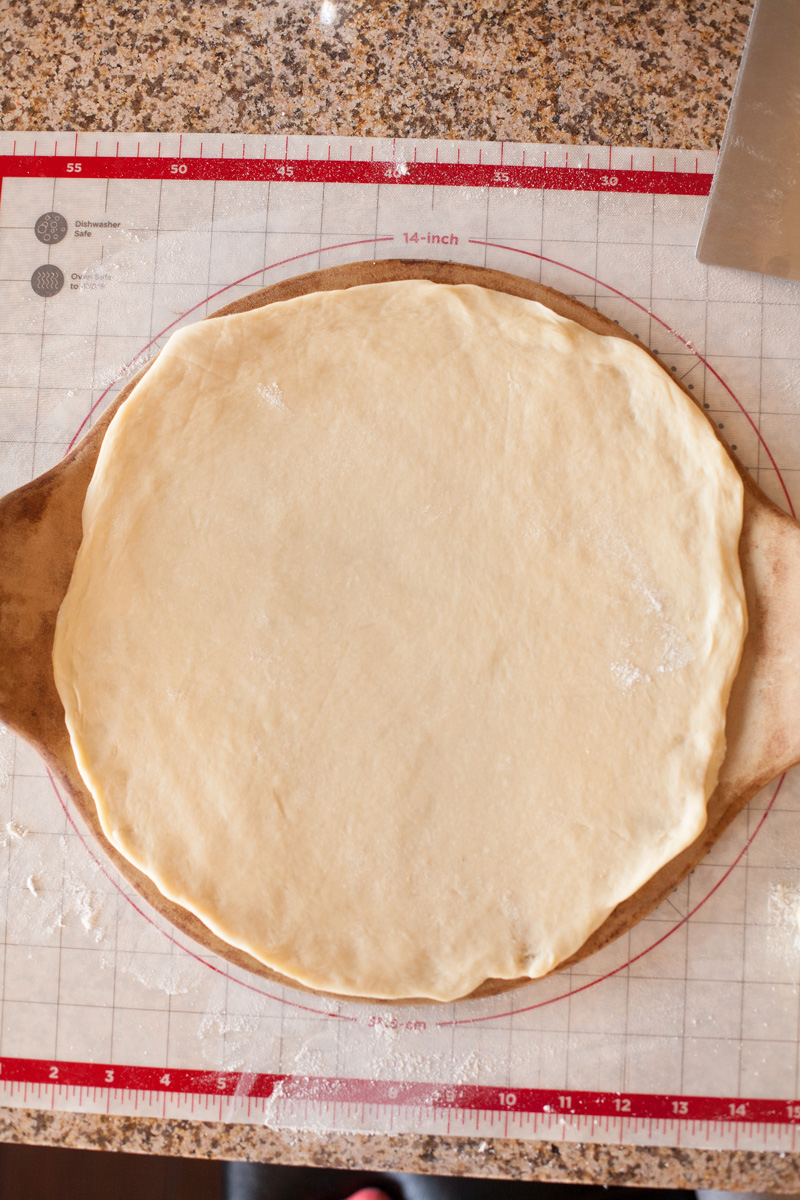
Set three of the pieces aside, and roll out one piece on a lightly-floured pie mat or large cutting board or clean countertop. (Just make sure your work surface is clean and dry before you sprinkle it with flour).
Your aim is to roll the dough into a large circle, between about 10 and 13 inches. The size will depend on the size of your cookie sheet, pizza stone, etc. that you are using. Obviously, don’t roll the circle larger than the width of your baking sheet.
Since I was using a large pizza stone, I rolled my dough circle out to about 13 inches.

Lightly grease your baking sheet or pizza stone with butter (don’t use nonstick spray). If you grease your baking implement too much, the dough won’t hold its shape when you place it on top.
Alternately, you can cover your baking sheet with parchment paper or a silicone baking mat. If you do this, you don’t need to grease the parchment paper or the mat.
Now pick up your dough and place it on top of your pizza stone, pizza pan, or baking sheet. It won’t go down in a full circle. Don’t worry about that! Just pick up the edges of the dough and pull them out gently until the dough forms a circle. This elastic dough is very stretchy, forgiving, and easy to work with. Press down a little on the edges so they stick to the pan and stay put.
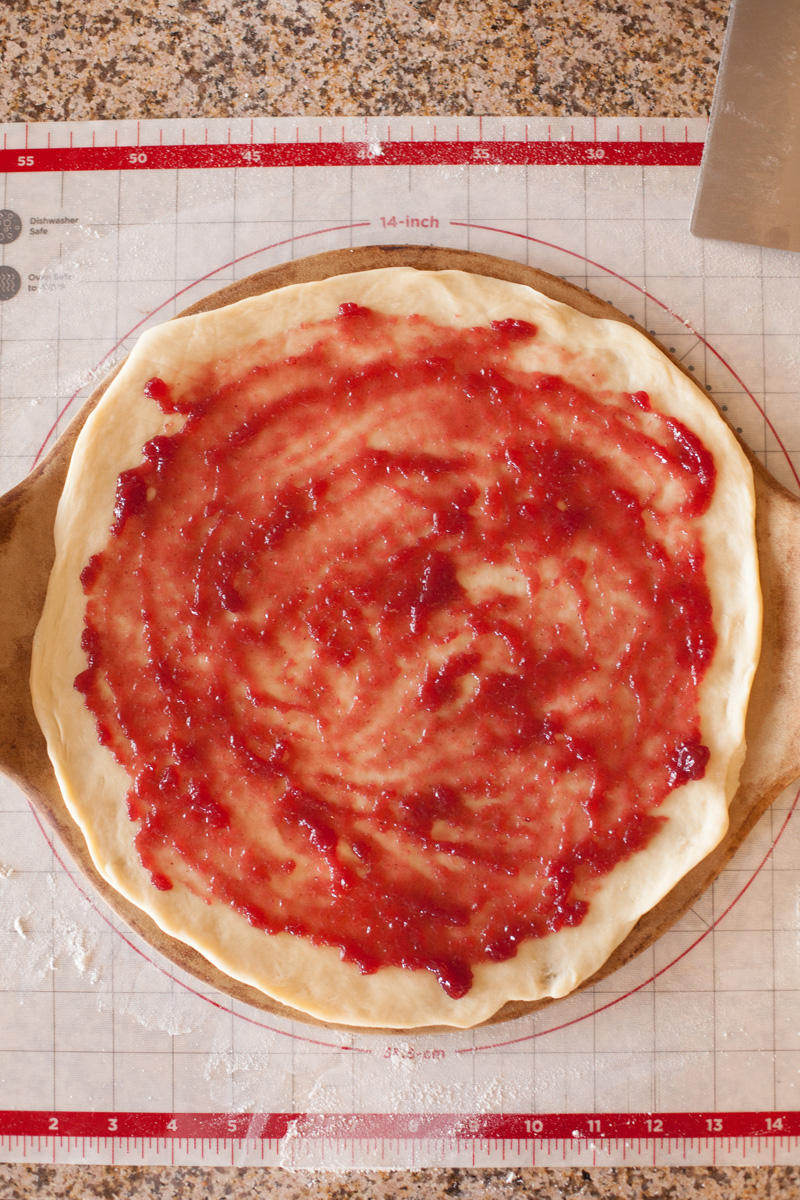
Now it’s time for your first layer of filling! Spread a thin layer over the top of the dough, but leave half-an-inch to an inch of the edge bare.
Set that aside and roll out your next layer of dough to the same size as your first layer. Pick up this second circle of dough and place it over the top. Once again, unless you have someone else helping you hold your dough in a perfect circle as you transfer it, the dough won’t lay perfectly atop your filling. Just pick up the edges and stretch them to meet your bottom layer, pressing down to try to seal the edges.
Add more topping, and then roll the next layer of dough and place on top.
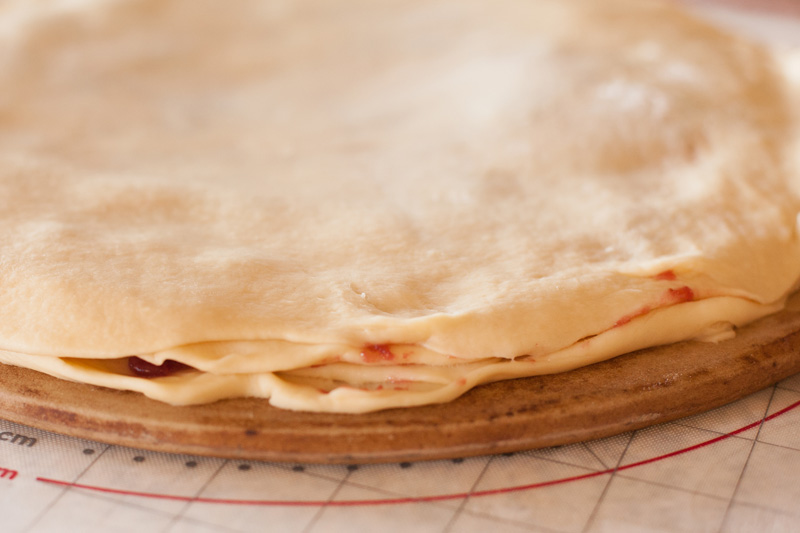
Add a third layer of topping. Roll the last circle of dough and place it on top.
In all, you’ll have four layers of dough, and three layers of filling.
At this point, some people use a sharp knife to cut around the edges to make sure the layers of dough are in a perfect circle. I don’t think this is necessary, as this results in excess dough that might be wasted. And this dough is so unbelievably soft and makes such sublime fluffy bread once baked that it would be shame to waste any of it!
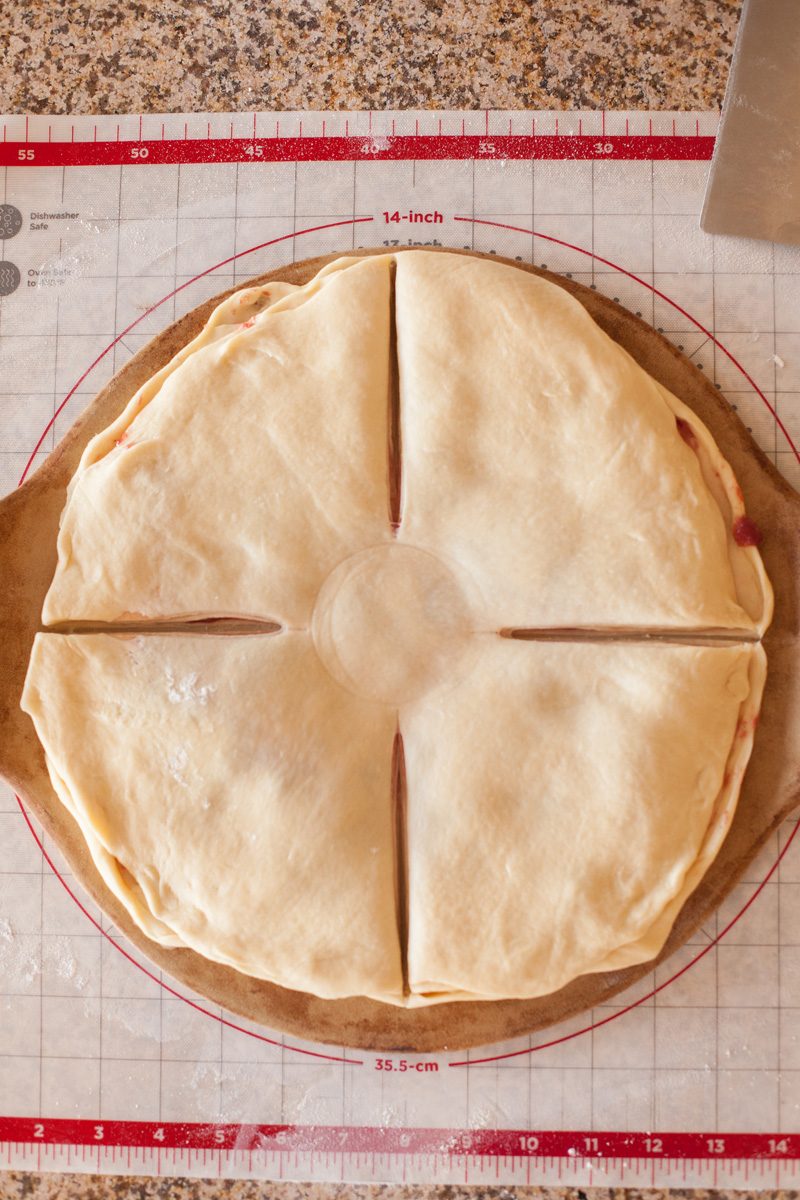
Now the real fun starts! Get a cup or round cookie cutter and lightly press in the center of the dough.

Now get a large, sharp knife or a pizza cutter and make four cuts through all the layers, ending at the edge of the cup marking.
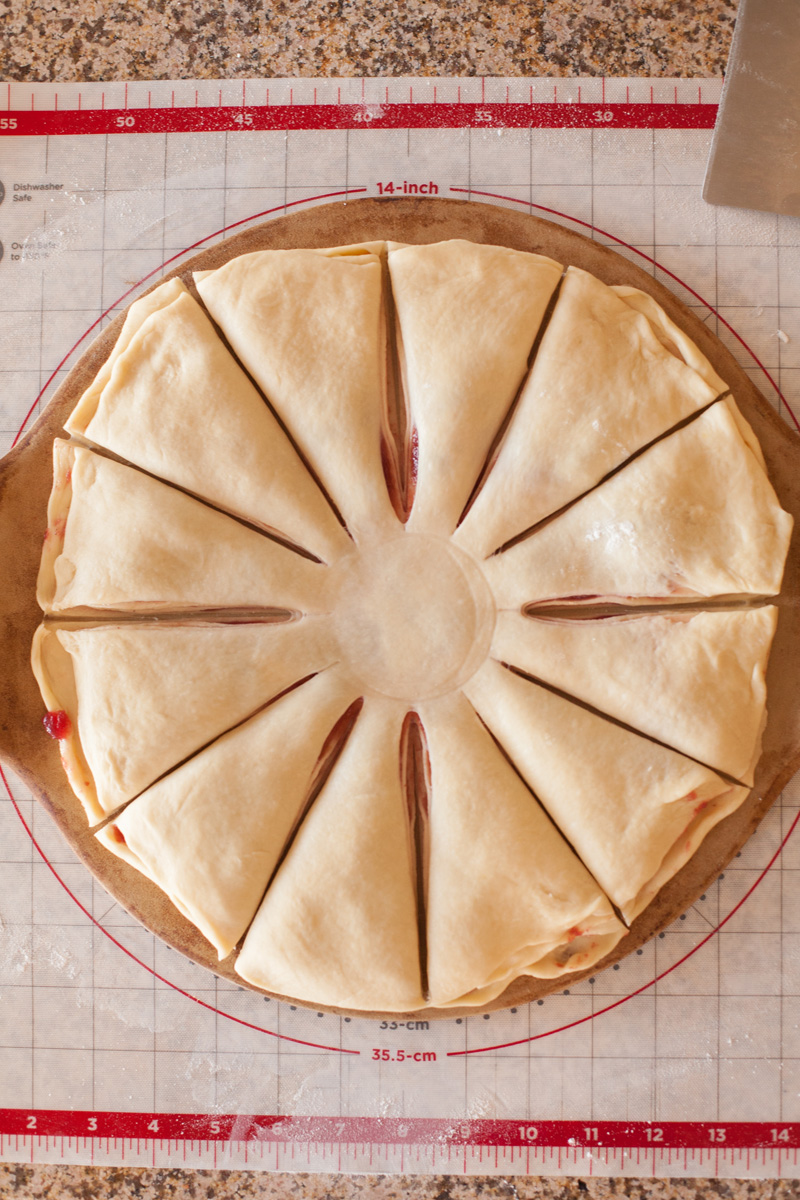
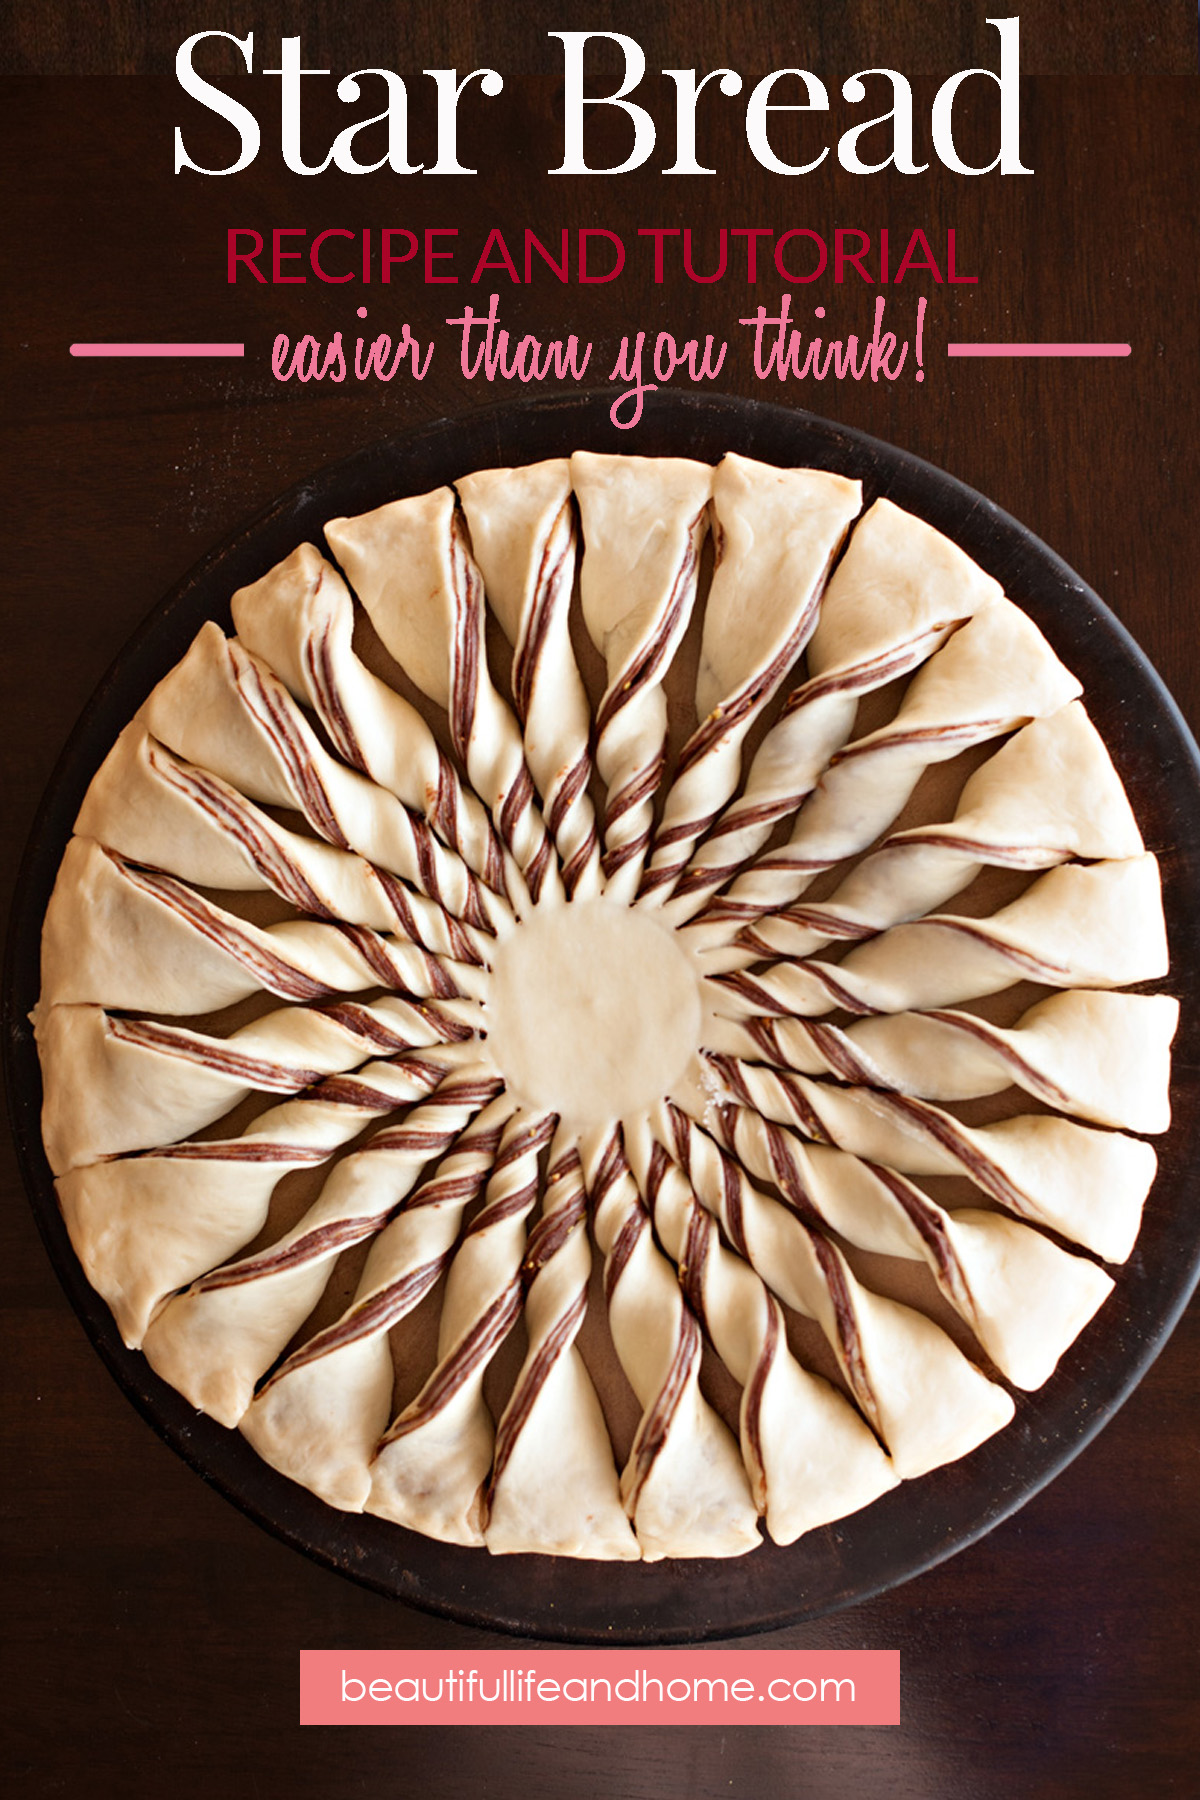
At this point, I’ve changed things from other Star Bread recipes I’ve seen. Most of the other recipes just have you cut the bread so that you get eight “points” (or in other words, eight pieces you can pull off and eat), but since I was making these originally for a party, I wanted to have more pieces for people to be able to eat. So I increased the number of “points” to twelve.
First, I cut three slices into each section so that I had twelve cuts in total.
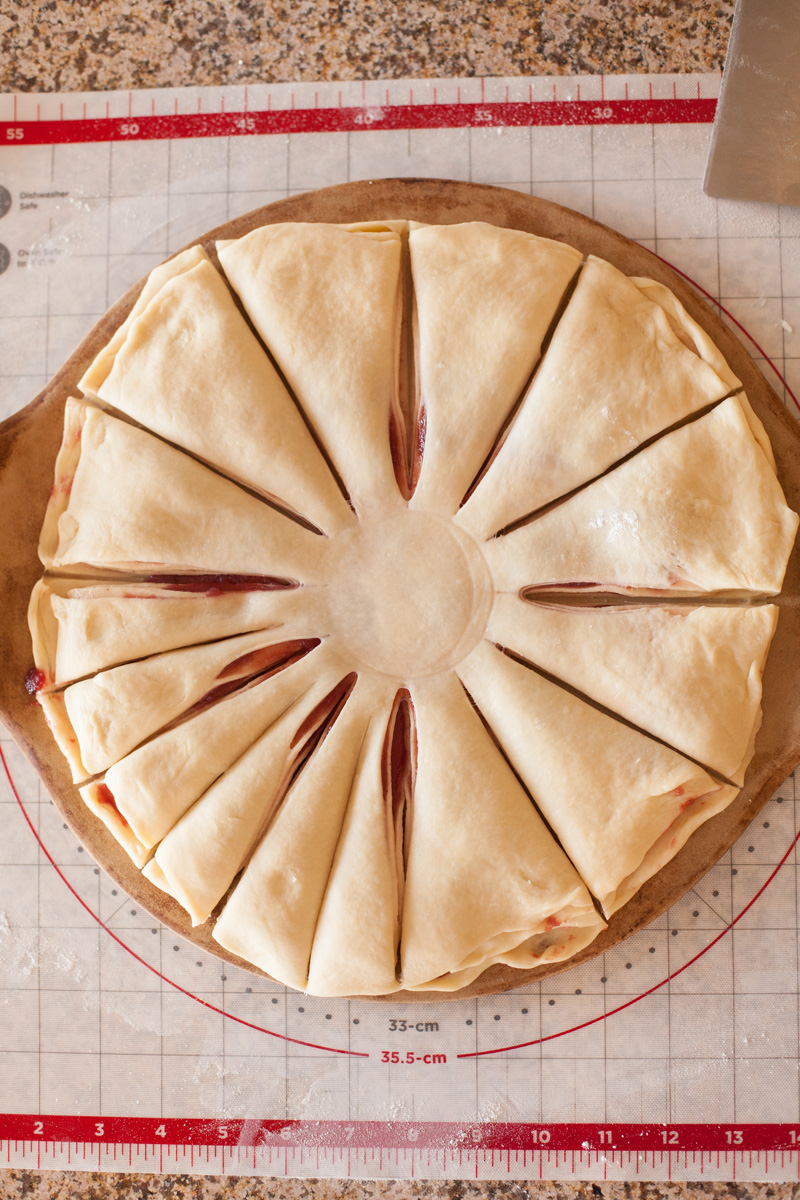
Then, one section at a time, I made a slice down the middle of each of the pieces of dough. (Altogether, this would make 24 total slices). I just cut one section at a time because it was easier for me to manage.
Now you’re going to pick up two neighboring pieces of dough and twist them AWAY from each other twice and then pinch the edges together. (So you’re twisting the dough in opposite directions).

After twisting, I pinched the edges of the dough together and then kind of folded them under a little so the twists wouldn’t unravel and to hide any uneven edges of the dough.
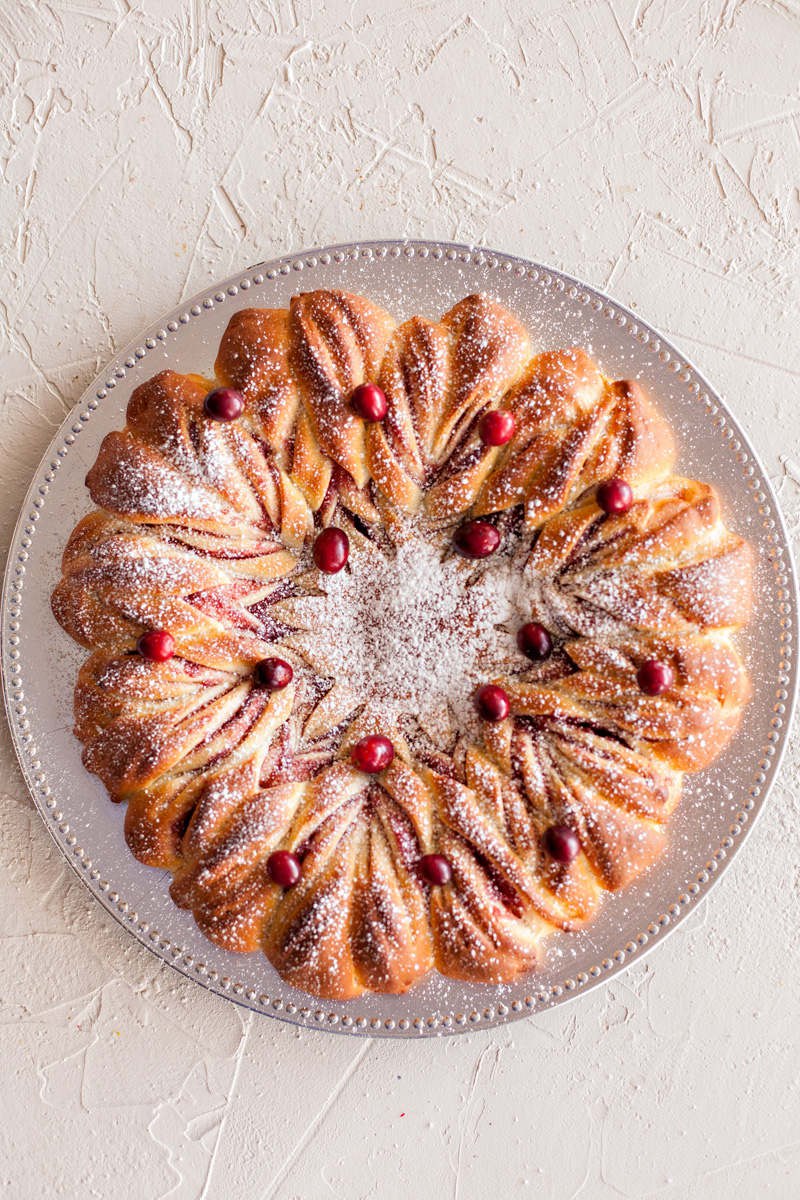
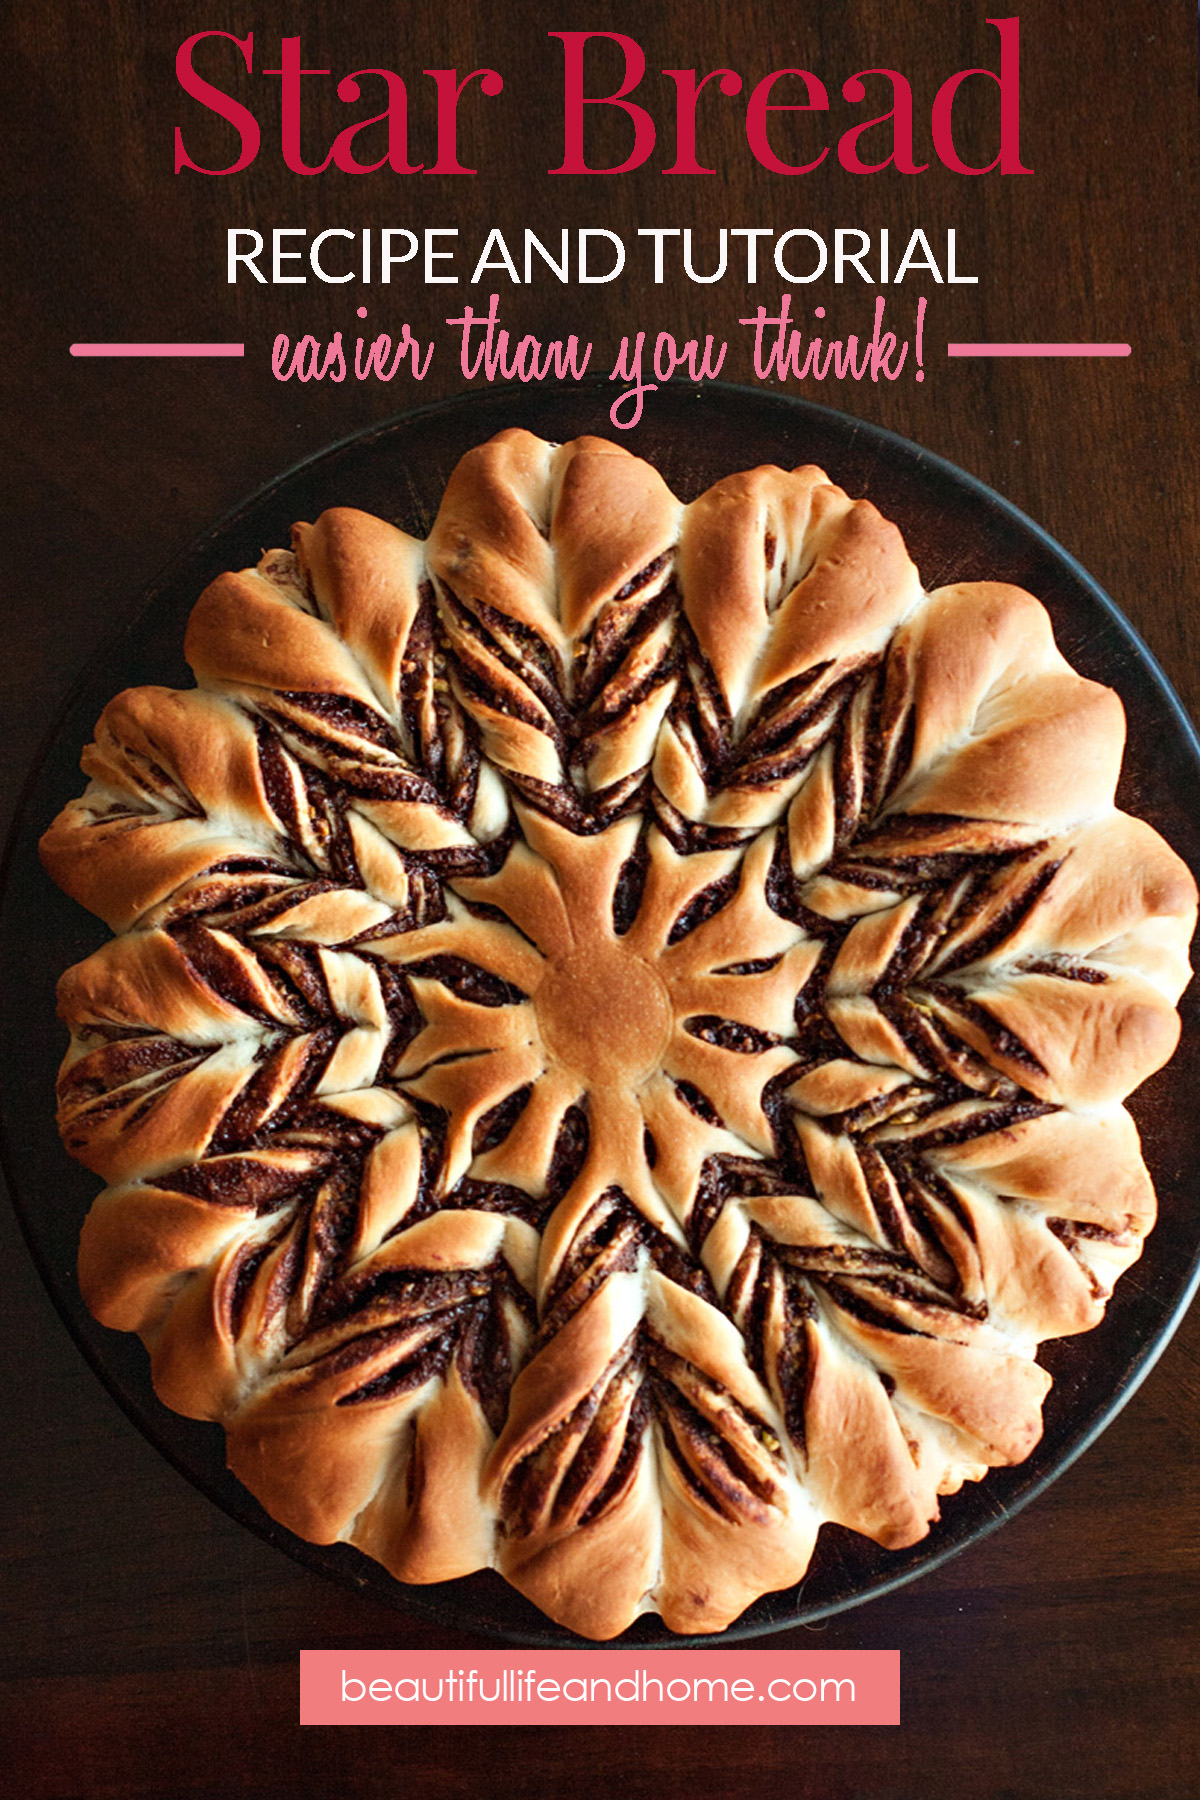
Typically, you’ll go around your Star Bread picking up pieces and always twisting them away from each other. But I decided to have a little fun, so I alternated twisting them away from each other, and twisting them toward each other.
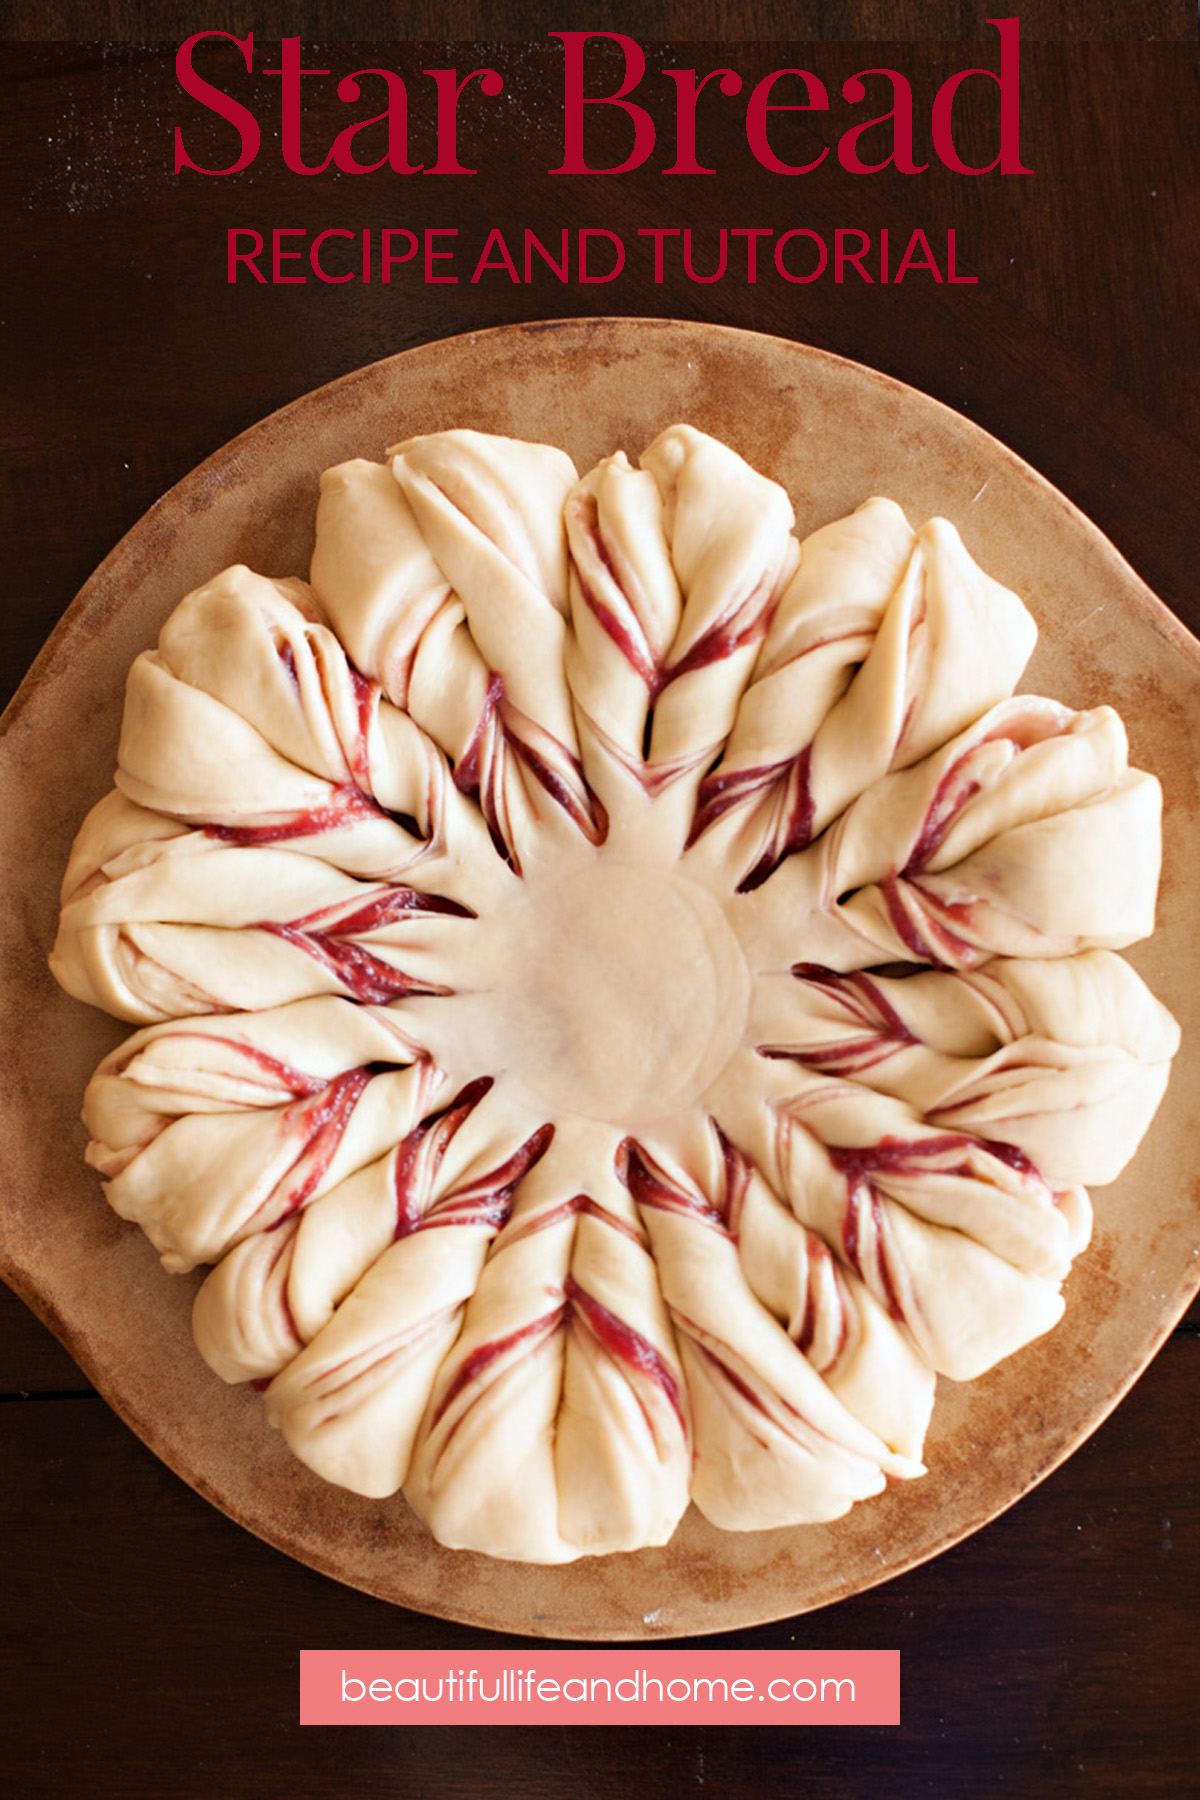
When I was done, the end result looked like this:

Now you just want to let this rest while you heat up your oven. It doesn’t need to go through a whole rise again. I just lightly covered this with plastic wrap and let it sit while I heated my oven to 375 degrees F.
Right before baking, you can brush the top with an egg wash if you want. But I don’t do this for two reasons: I don’t want to accidentally smear any of my filling, and if I’m just going to sprinkle powdered sugar over the top, I don’t see the need for an egg wash. But if you’re an egg wash kind of person, go for it!
Once your oven is heated, pop the Star Bread in and enjoy the marvelous smells for 20-30 minutes while it bakes and browns beautifully!
You may wonder why there is such a large time-span for cooking. It depends on a couple of things.
The first is how thick you’ve rolled your dough. If you’ve done a 10-inch circle, your dough will be thicker than if you’ve done a 13-inch circle. In that case, your bread will take longer to bake.
The second is whether or not you use stoneware or metal sheets. Stoneware will take longer than metal. So just keep your eye on the bread, and when it is golden brown and the part closest to the center looks like it’s baked, it’s time to take it out.

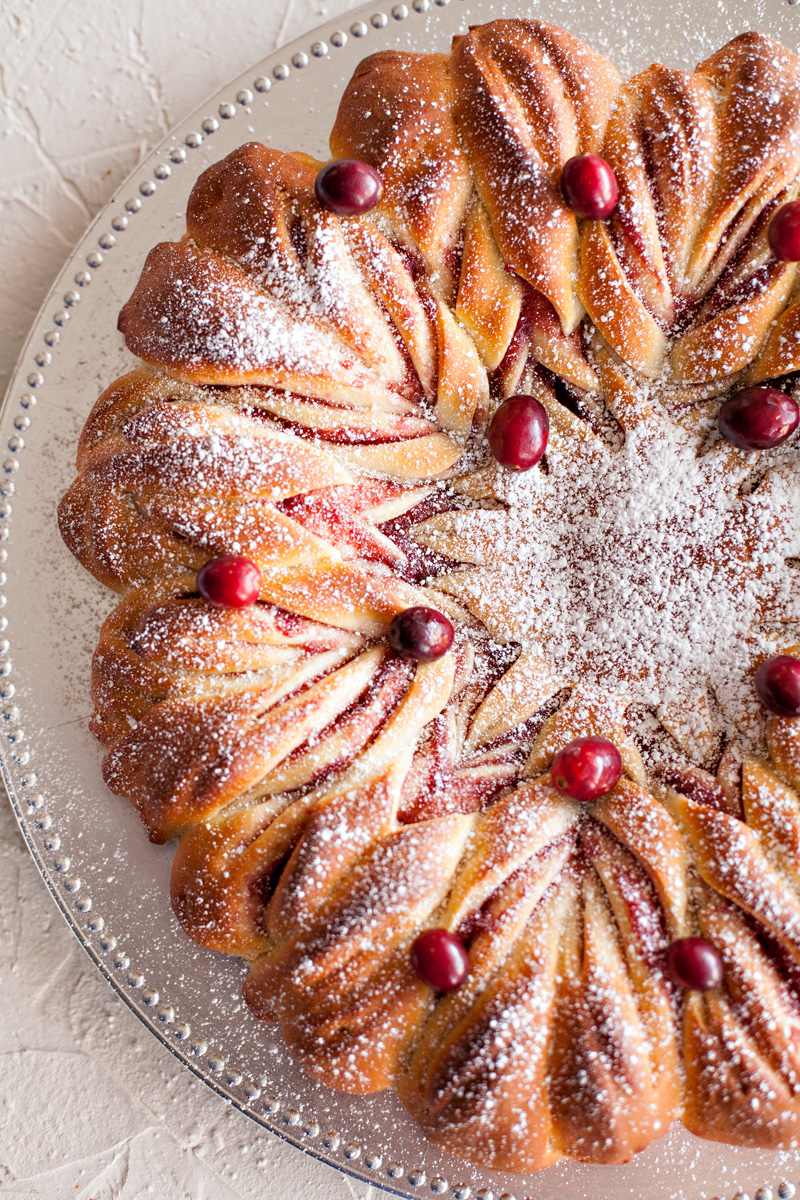
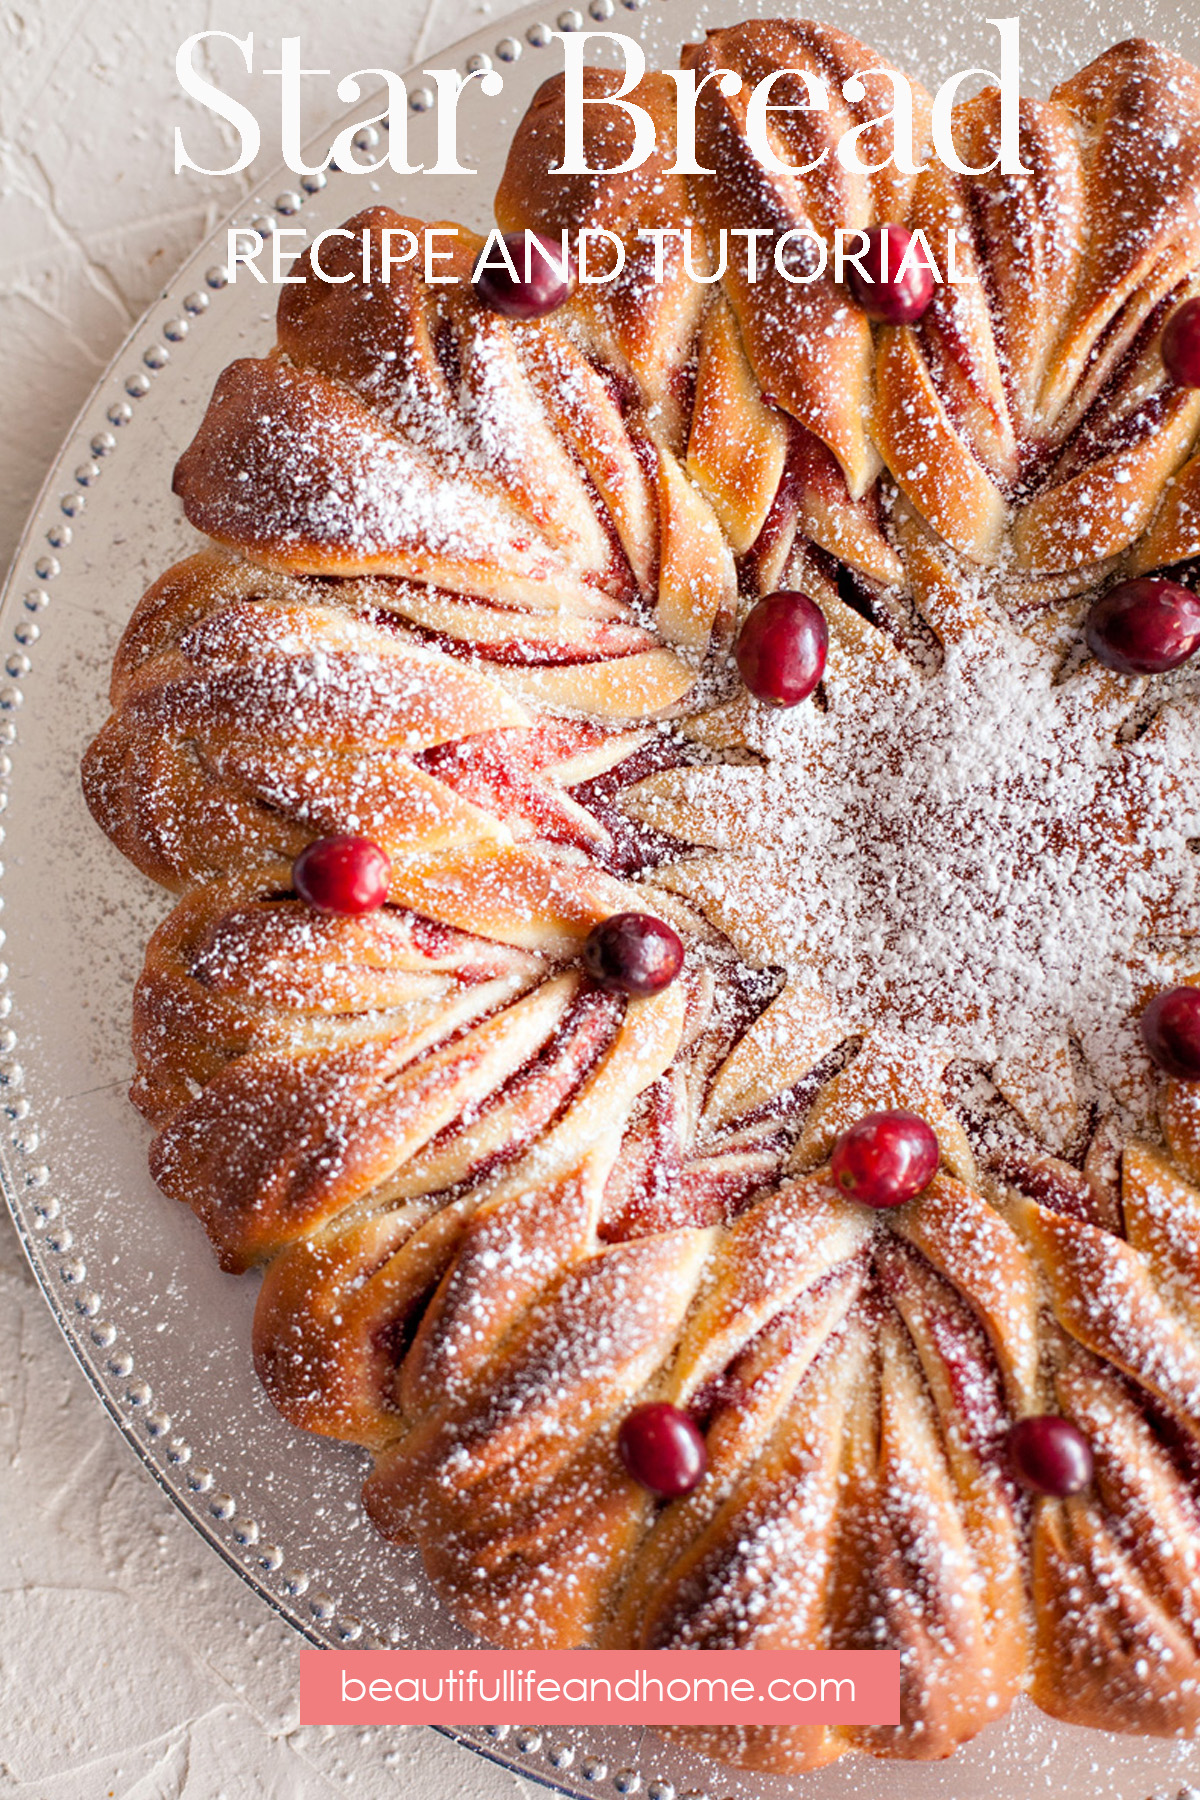
A fun way to dress up any Star Bread is by sifting some powdered sugar over the top.
You can also leave it naked if you like, and provide some thin icing for dipping.
How to Store Star Bread
Store any leftover bread at room temperature for one to two days, covered. If you need to store the bread for longer than that, you can refrigerate it for up to 5 days. Just understand that refrigerating bread tends to dry it out and make it less soft.
If your bread starts to go a little stale, simply cut yourself a piece and warm it up in the microwave for about 15 seconds to soften it up again.
Videos of How to Make Star Bread
If you want to see a video of how to make Star Bread, here are two for you to check out:
Chocolate Pistachio Christmas Star Bread from The Live-In Kitchen
How to Make Star Bread from Sally’s Baking Addiction
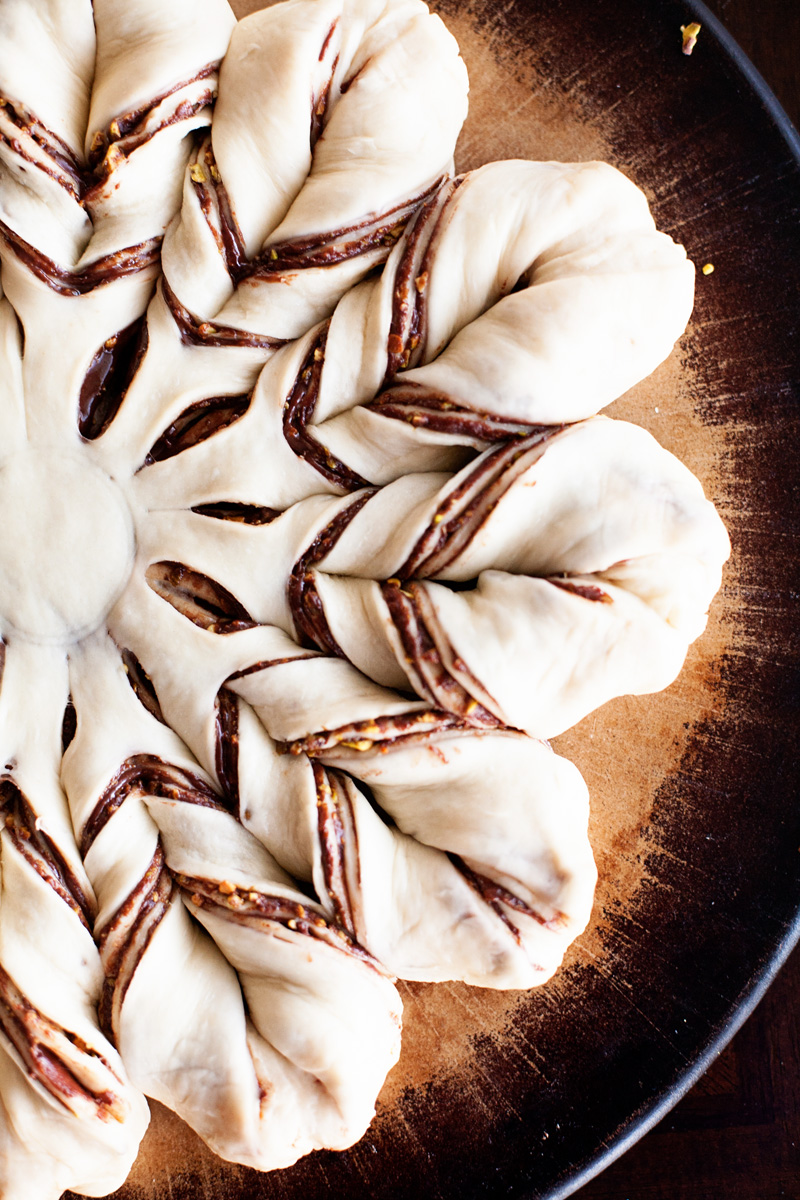
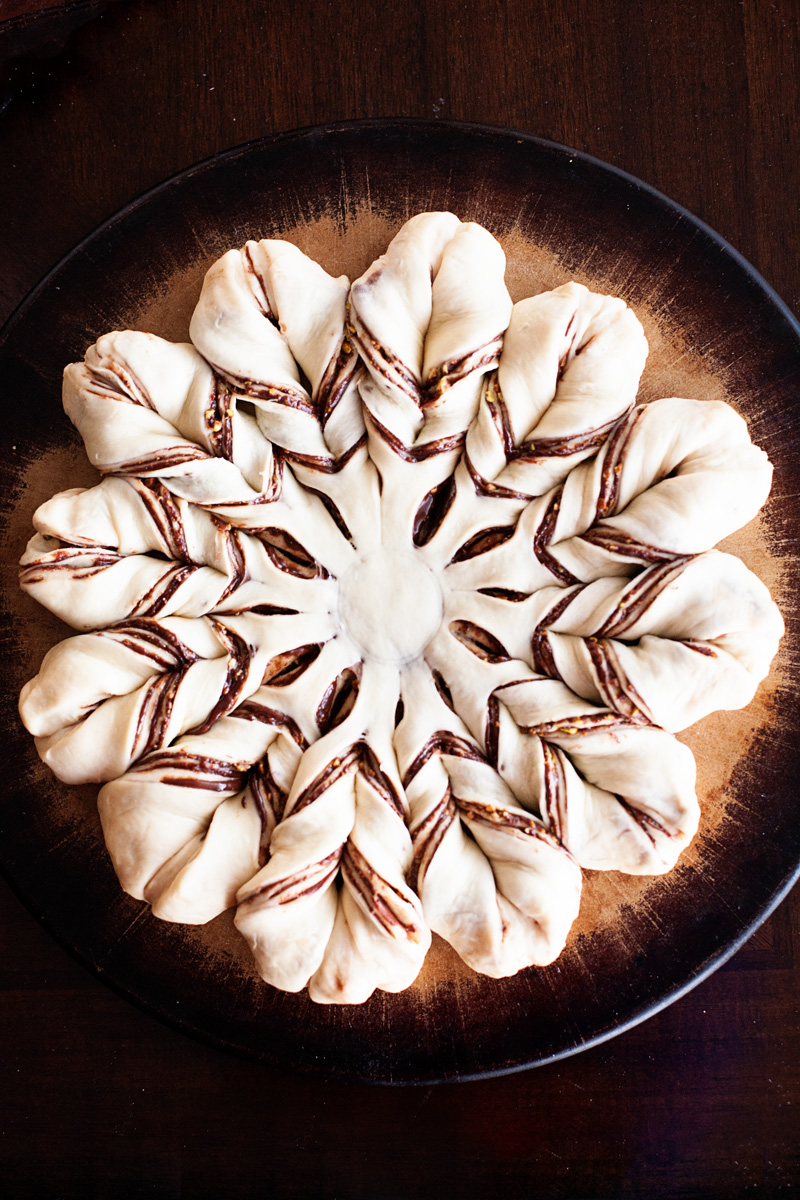
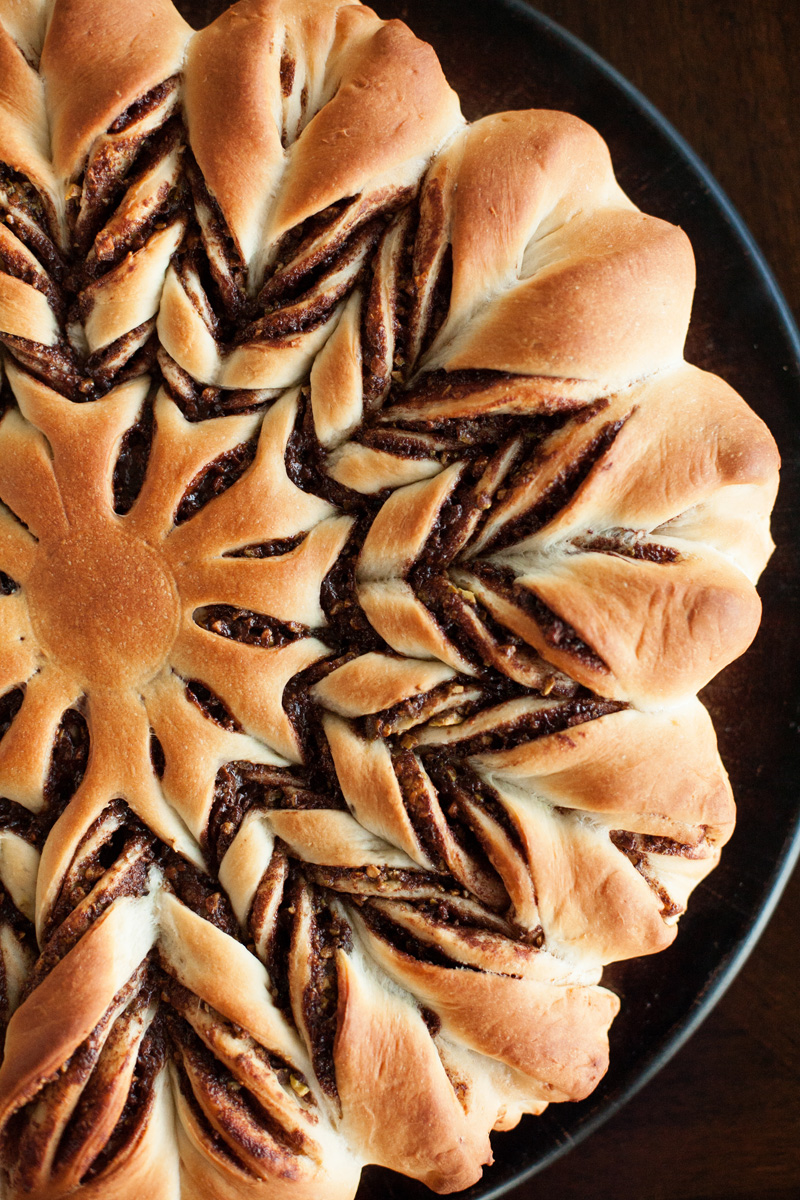
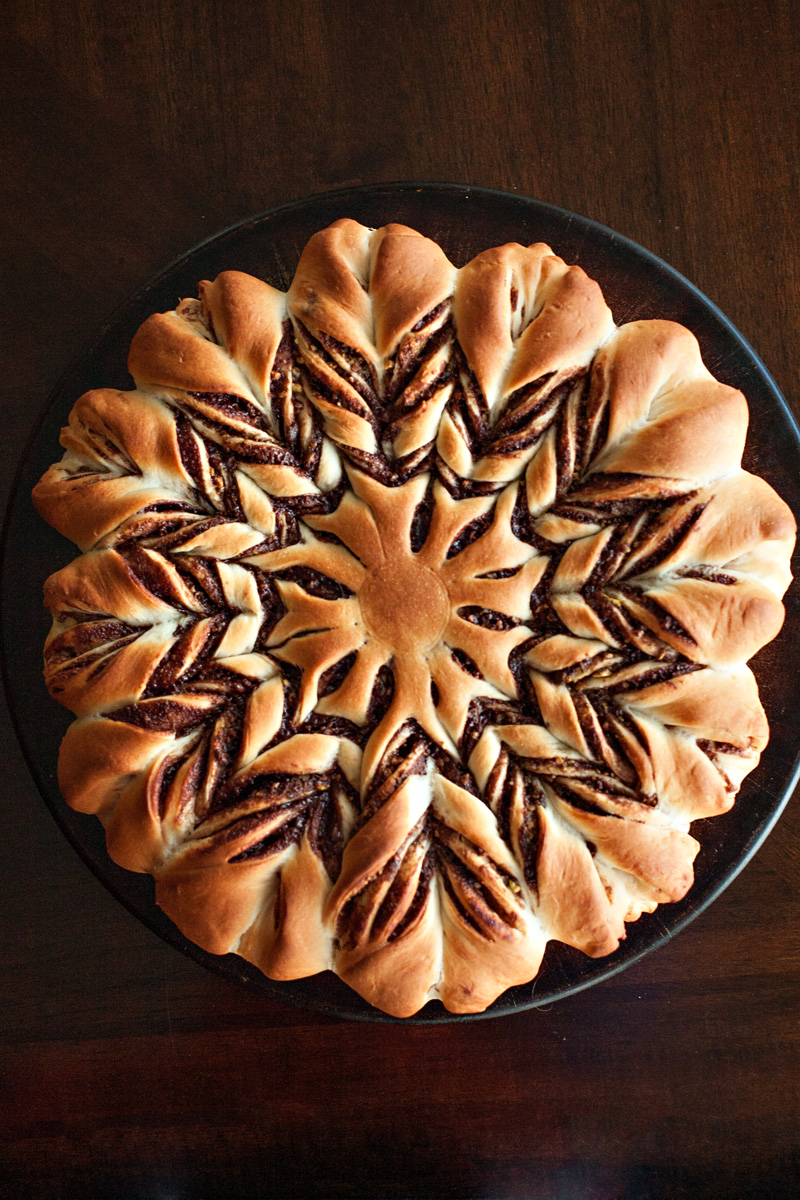
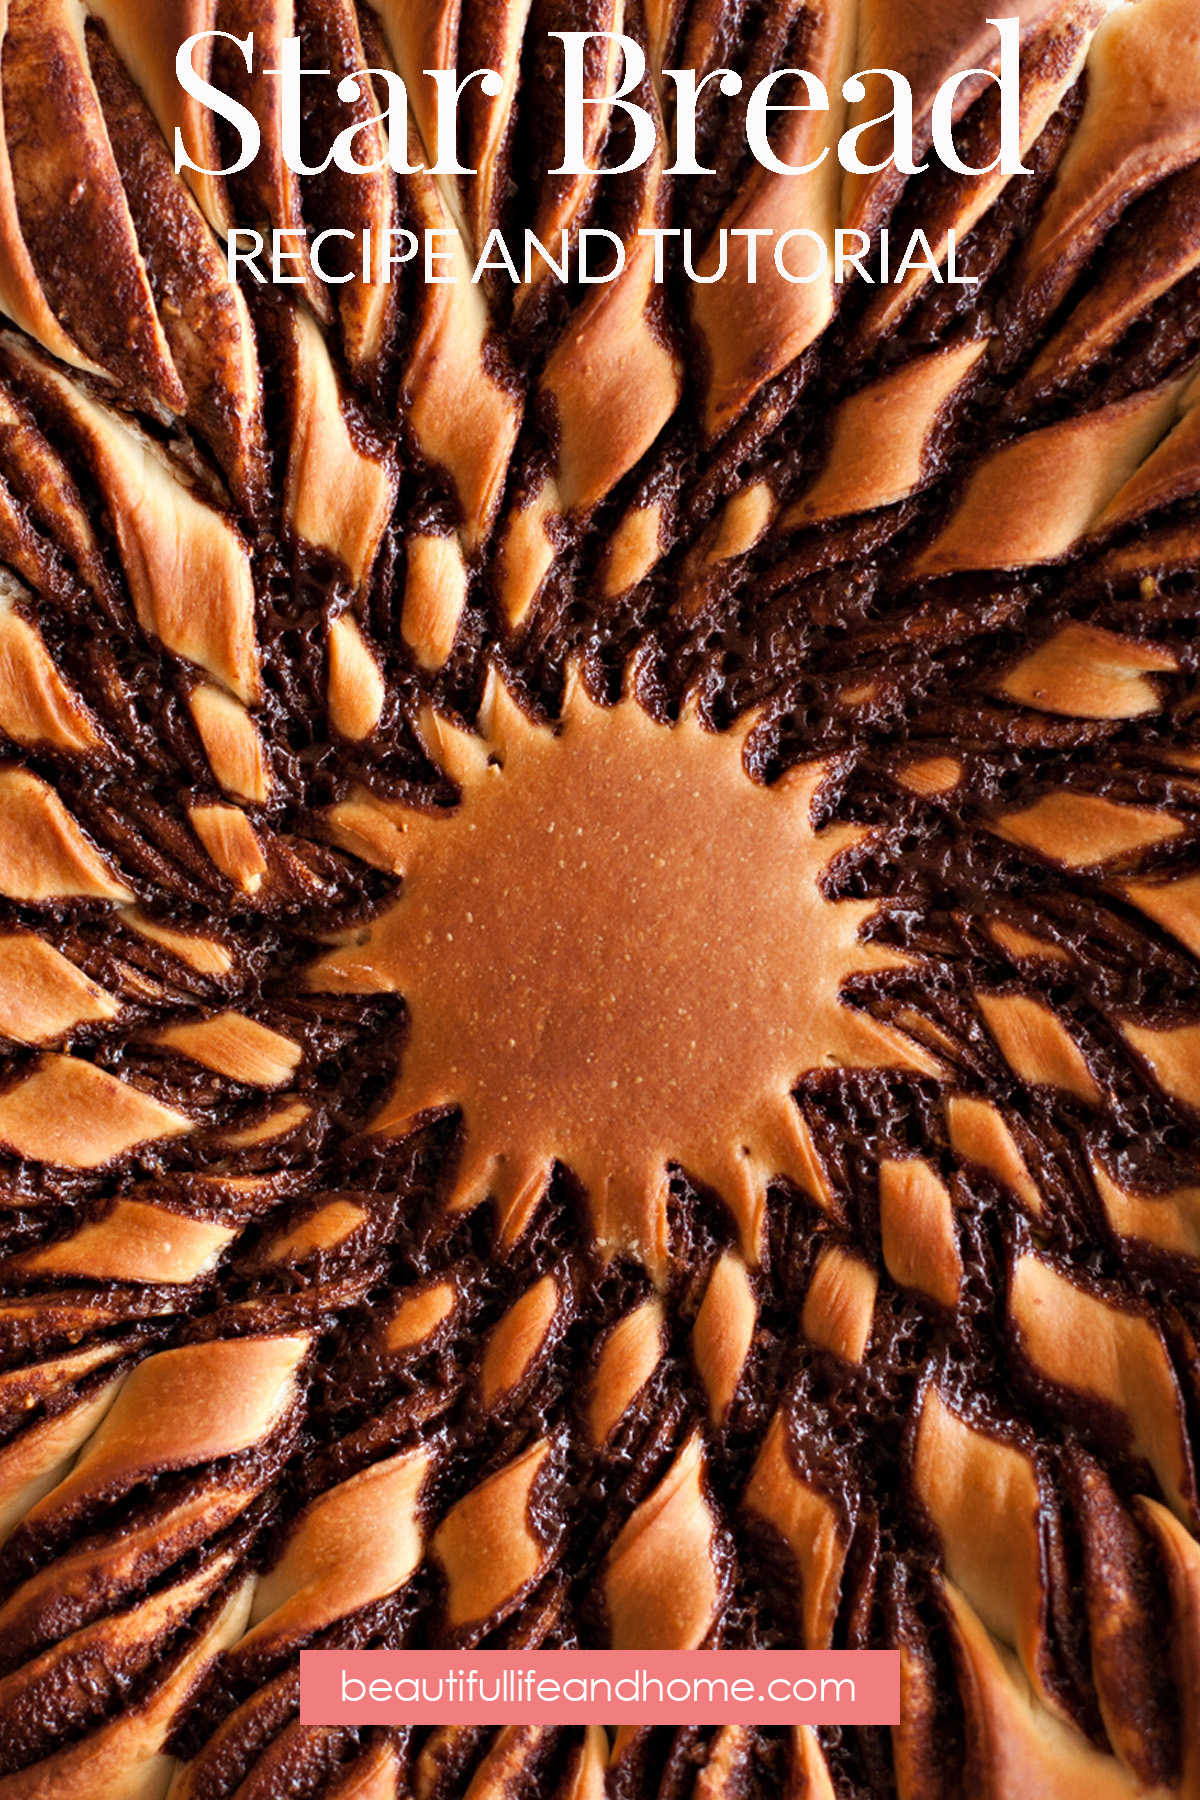
Here are some pictures of the Chocolate Pistachio Star Bread I made. For this Star Bread, I twisted all the pieces of dough away from each other. Here you can really see the classic star design.
This is before baking:
And after baking:
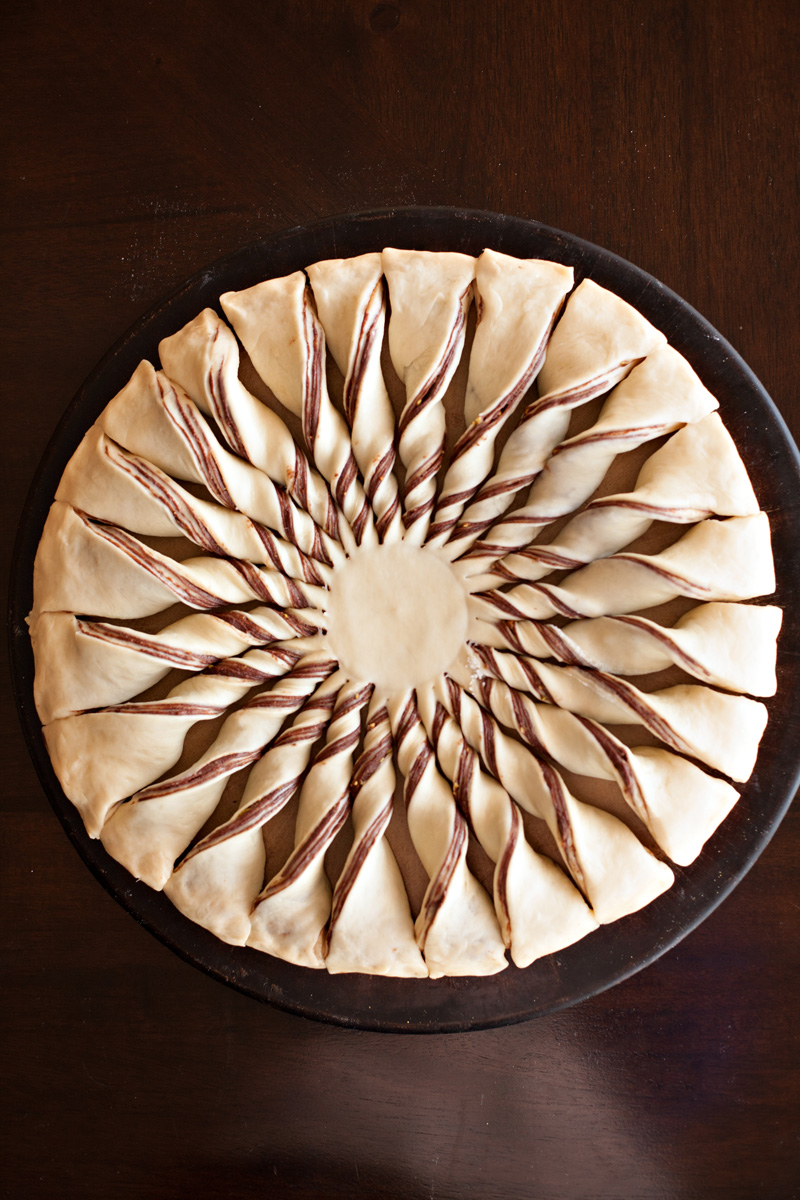
A Fun, Alternate Design For Star Bread
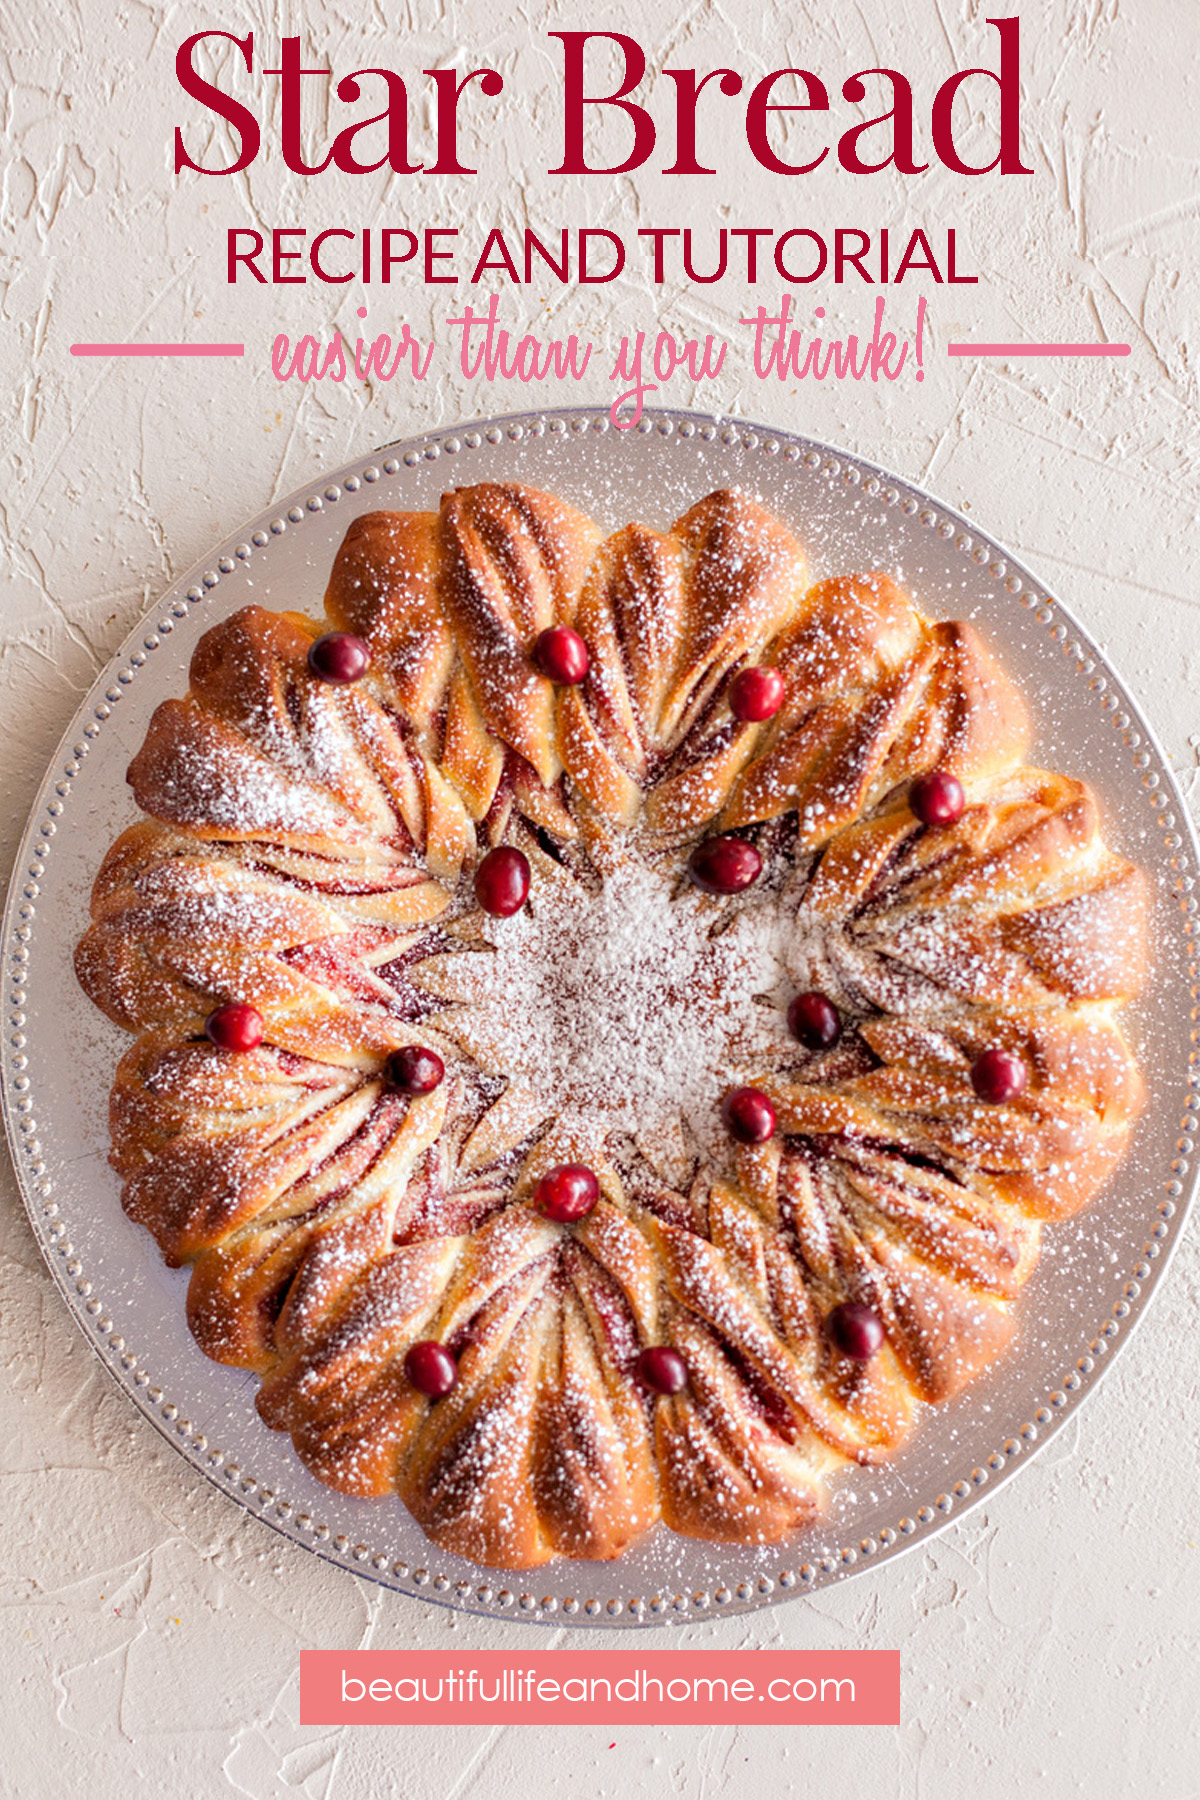
Here’s a super easy way to switch things up! All you do is pick up one piece of sliced dough at a time, twist it three times to the left, and lay the end down.
Do the same with all the other pieces of dough. Just pick them up one by one, twist three times to the left, and lay the end down. Basically, all the pieces will be twisted in the same direction, and you won’t be pinching any ends together.
Here’s what it looks like before baking:
And after baking:
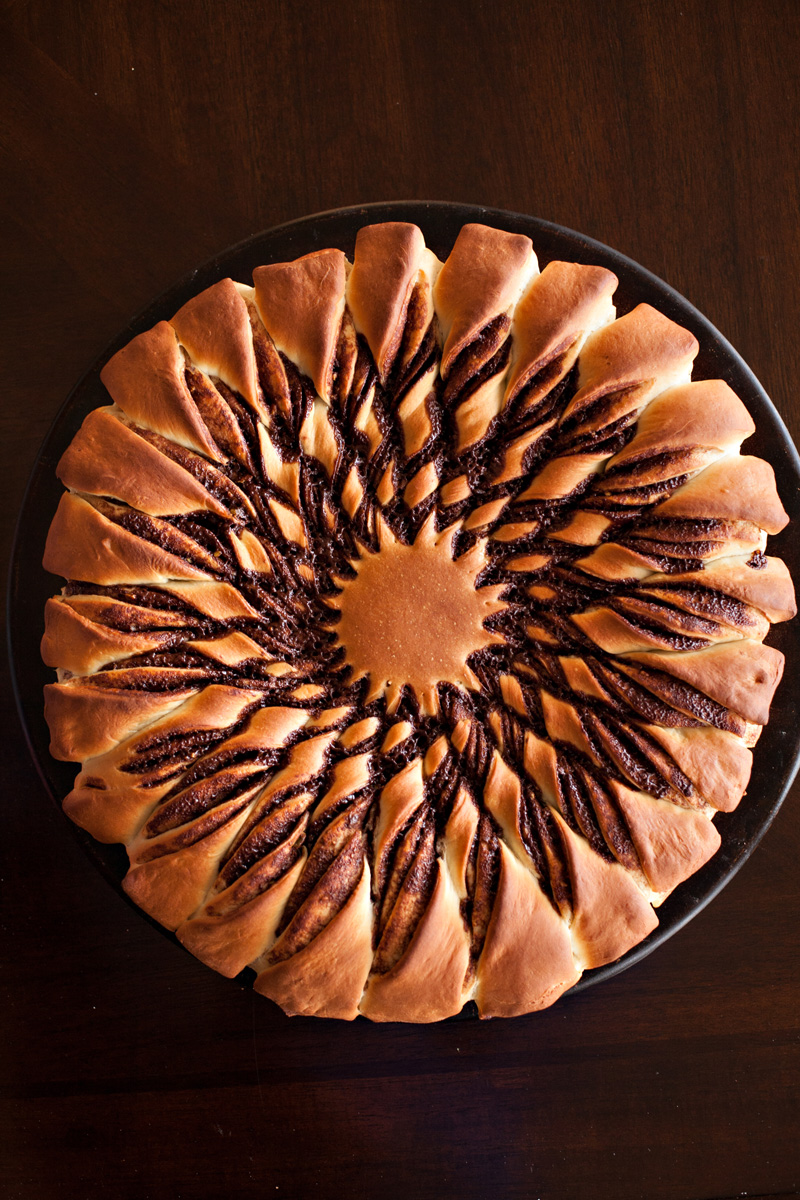
Super cool, right?
How to Serve Star Bread
Ideally, this is a “pull-apart bread” type of thing. But in practicality, it’s easiest to just cut where the natural separation points are. That way, you can get all the way to the center. At the party, I just had a knife available and people cut their own pieces.
To transfer the bread to a serving platter, just use a large spatula to loosen the bread from the baking sheet, and then gently slide it onto your serving platter.
Can You Make Star Bread Ahead of Time?
Option 1:
You can prepare the dough through the first rise. Then after punching down the dough to remove the air bubbles, you can cover it tightly and store it in the refrigerator for up to two days.
When ready to roll out and assemble, take it out of the refrigerator and allow it to rest at room temperature for about 20 minutes before beginning to roll and shape your Star Bread.
Option 2:
Prepare everything as instructed in the recipe and tutorial without baking. As soon as your Star Bread has been assembled and formed on your baking sheet or baking stone, cover it with plastic wrap and place in your refrigerator. When ready to bake, remove from the refrigerator and allow to sit at room temperature for about 20 minutes. Then bake as usual.
You can store the assembled bread overnight in the refrigerator. But don’t try to keep it there for any longer, or it will rise and the result will not be as good. This is great to make ahead for Christmas morning!
If you make this, I’d love to hear how it goes for you! Please leave me a comment!
Star Bread Recipe
Let me show you how to make this amazingly impressive, delicious, and easy Star Bread! Not just for Christmas, this beautiful bread can be made at any time of the year with a multitude of different fillings--from cinnamon to chocolate to raspberry and beyond!
Ingredients
For the Bread
- 2 1/4 teaspoons active dry yeast
- 1/4 cup granulated sugar
- 3/4 cup whole milk, warm (about 110 degrees F)
- 1/4 cup warm water (not hot)
- 1 large egg
- 1/4 cup butter, softened and cut into pieces (can use salted or unsalted)
- 1 teaspoon salt
- 3 1/4-3 3/4 cups all-purpose flour
For the Chocolate Filling
- 4 ounces semi-sweet chocolate or chocolate chips
- 3 Tablespoons honey
- 3 Tablespoons butter (salted or unsalted)
Instructions
Add the yeast and 1/4 granulated sugar to your large mixing bowl or bowl of your stand mixer.
Heat your warm milk and water together to about 110 degrees F. (It should feel nice and warm, but not hot).
Pour the warm milk and water over the yeast and sugar and let the yeast proof for 5-10 minutes until it looks frothy.
Add the egg, 1/4 cup of cut-up butter, salt, and 3 1/4 cups of flour. Using a wooden spoon (if mixing by hand) or the dough hook attachment (if using a stand mixer), mix slowly until everything comes together and there is no danger of flour flying around.
Keep mixing until the dough doesn't stick to the sides of the bowl, but still sticks to the bottom. Add up to 1/2 cup more flour if needed. (Just add two tablespoons at a time and thoroughly mix in before deciding if you need more).
Your dough is done when it is soft and just slightly sticky to the touch. (When you poke it with your finger, your finger should pull it a little when you take it out, but dough should not stick onto your finger).
Move the bowl with the dough to a warm place in your kitchen and cover with plastic wrap. Allow the dough to rise until doubled in size--about 60-90 minutes.
While the dough is rising, prepare your chocolate filling. (If you are using any other type of filling, like jam, Nutella, pie filling, etc., you can wait to get it out until just before assembling your star bread).
For the chocolate filling, add four ounces of semi-sweet chocolate chips to a microwave-safe bowl. Then add 3 tablespoons of butter and three tablespoons of honey.
Microwave on high for 30 seconds. Remove from the microwave and stir. Microwave again for 30 seconds. Remove and stir again. When it looks like most of the chocolate has melted, don't microwave any more. Just keep stirring the mixture until the lumps melt and everything is smooth.
Set aside at room temperature while you wait for the dough to finish rising.
Once the dough has doubled in size, punch it down and transfer it to a lightly-floured surface.
Divide the dough into four even pieces. (If you want to be super-precise, you can weight each piece. I just eyeball it to see that they look roughly the same size).
Set three of the pieces aside. Roll one piece out on your floured work surface to a 10-13-inch circle. (The size of the circle you roll will depend on the size of your baking sheet or pizza stone/pan).
Lightly grease (with butter or shortening--not cooking spray) your baking sheet or stoneware. Alternately, you can line your baking sheet with parchment paper or a silicone mat. Neither of these will need to be greased.
Transfer your rolled dough circle onto your baking sheet. Re-shape it into a circle if necessary. It's o.k. if the edges are not perfectly round.
Now spread 1/3 of your chocolate filling onto the circle, leaving the outside edge of the dough free of filling. (You'll want to leave between half an inch and an inch bare at the edge of your dough).
Roll out the second piece of dough to the same size as the first and place on top of the filling. Stretch the edges of the dough so that they come out to the edge and match the circle underneath. Press the dough together at the edges if necessary.
Top the second layer of dough with chocolate filling (or the filling of your choice) just like the first layer.
Roll out your third circle of dough. Place it on top of the second layer with its filling, and top with filling.
Roll our your final circle of dough and place it on top of everything, making sure to stretch the edges and cover all the filling.
Now gently press down in the center with a cup or round cookie cutter to barely indent the dough.
Using a sharp knife or pizza cutter, cut from the outside edge of the dough into the outside edge of the circle you just made in the center of the dough. Make four cuts to slice the stacked dough into four large pieces, with the center still connected.
Make three more even slices in each of the four dough quadrants. You'll have 12 pieces of sliced dough.
Cut each of the 12 slices of dough in half so that now you have 24 pieces of dough. Remember that everything should still be attached at the center.
Pick up two neighboring pieces of dough, and twist them away from each other (one to the right, and one to the left) two times. Then pinch the ends together. You can also fold the ends under so that any untidy edges are hidden.
Continue twisting adjacent pieces of dough until you have completed the circle.
Set raw Star Bread aside and cover loosely with plastic wrap while you heat your oven to 375 degrees F. We are letting the dough rest--not waiting for it to rise.
Once the oven has reached 375 degrees F., remove the plastic wrap and bake the bread for 20-30 minutes until golden brown and it looks like the center has been baked. The length of time you bake your Star Bread will depend on whether or not your rolled it into a smaller circle (like a 10-inch circle, which would make your layers of dough thicker) or a larger circle (like a 13-inch circle, which would make your layers of dough really thin). If you're baking your bread on stoneware, it will also take longer than baking on metal pans.
Once removed from the oven, allow to cool for at least half an hour before transferring to a serving platter or dusting with powdered sugar.
Notes
Please reference the how-to pictures in the post as you are making this Star Bread. It will make all the instructions much more clear!
Choose your favorite to pin!


Leave a Reply