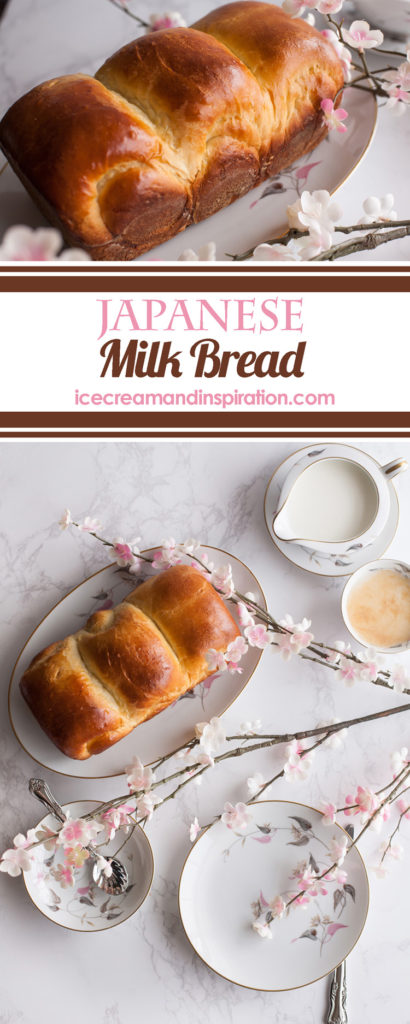
Classic Japanese Milk Bread recipe made with cream, milk, and an extra special something that makes it super soft, fluffy, and moist. Stays fresh for days longer than regular bread. Follow this step-by-step tutorial to make the fluffiest, yummiest bread ever!
Japanese Milk Bread (Hokkaido Bread or Shokupan).
What is Japanese Milk Bread (also known as Shokupan and Hokkaido Milk Bread)?
My friends, your life is about to change. This fluffy Japanese Milk Bread is quite possibly the best bread on the planet. Yes, it’s true. My Overnight Yeast Rolls, French Bread Rolls, and Bread Bowls are all pretty spectacular. But if I could only choose one bread to eat before I die, it would have to be this Japanese Milk Bread. It is my all-time favorite bread.
When I lived in Japan nearly twenty years ago (What the HECK? How can I be this old?) there was one choice for bread at the store, and this was it. Why were there not any other choices? Because everybody took one bite of this bread and knew they had found the holy grail of bread and that there was no need for any other varieties.
I actually never tried making this bread at home until last month, and I cannot believe I have deprived myself for the past twenty years. I made this bread for three days in a row, because I COULD NOT STOP EATING IT. (I made a total of four loaves). My family could not stop eating it, either. It’s like crack in bread form. Just thought I should warn you 🙂
This recipe for Japanese Milk bread uses heavy whipping cream along with milk. It’s also made with a special roux called “tangzhong.”
Today’s Freebie!

What is Tangzhong?
And why does it sound Chinese rather than Japanese? Well, it actually means “water roux” and was invented by the Japanese, but popularized by a Chinese woman (who presumably gave it a Chinese name). It’s a simple mixture of water and flour, cooked on the stove until it turns into a paste.
Why would you use the “tangzhong method?” Well, it all has to do with chemistry. Cooking the flour with water pre-activates the starches in the flour, making them more able to absorb water. Because the starch holds on to this water, it creates more internal steam while baking, giving your bread a higher rise and fluffier texture. Your bread will also stay moist and fresh longer after baking. So yes, it’s totally worth the extra step to make it (which really just takes about two minutes).
Ingredients for Japanese Milk Bread
Don’t worry. You don’t need anything fancy and won’t need to take a trip to the Asian market to get anything for this bread. You might already have everything you need! Take a look at the list of ingredients and see:
- water
- bread flour (easily made at home–I’ll tell you how in a minute)
- whole milk
- active dry yeast
- salt
- sugar
- heavy whipping cream
- eggs
- butter
How to Make Bread Flour
Bread flour just has a little extra gluten in it. So all you have to do is add 1 teaspoon of gluten to each cup of regular all-purpose flour. I use Bob’s Red Mill Vital Wheat Gluten. You can order it from Amazon by clicking on my affiliate link there, or you can find it in any grocery store. But no biggie if you don’t want to use bread flour. You can use regular flour and your bread will still be wonderful and delicious.
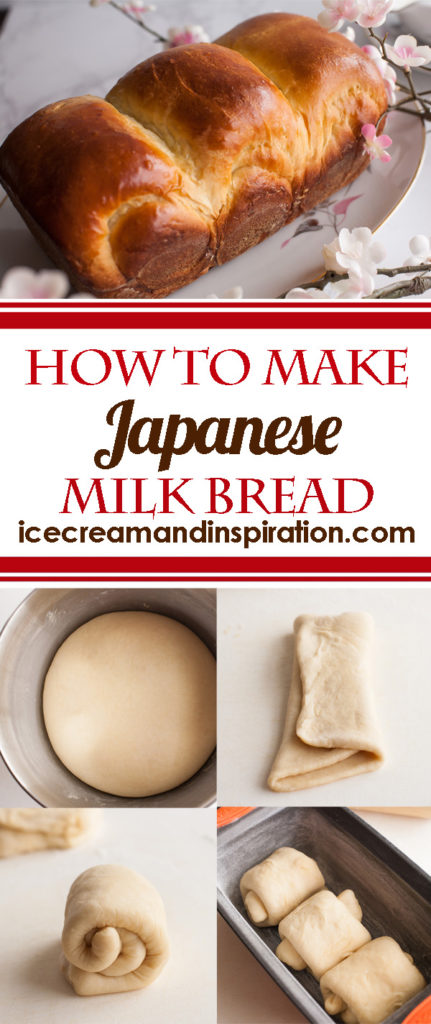
How to Make Japanese Milk Bread
I’ve got lots of pictures for you to help you along every step of the way. So let’s get started!
First, make your tangzhong. Just put six tablespoons of water with two tablespoons of flour into a small saucepan on the stove. Mix it with a whisk over medium-low heat, making sure to get rid of all the lumps. After a few minutes, it will thicken to a paste.
You’ll know it’s ready when you drag your whisk across the bottom and the lines remain. At this point, remove it from the heat and let it cool.
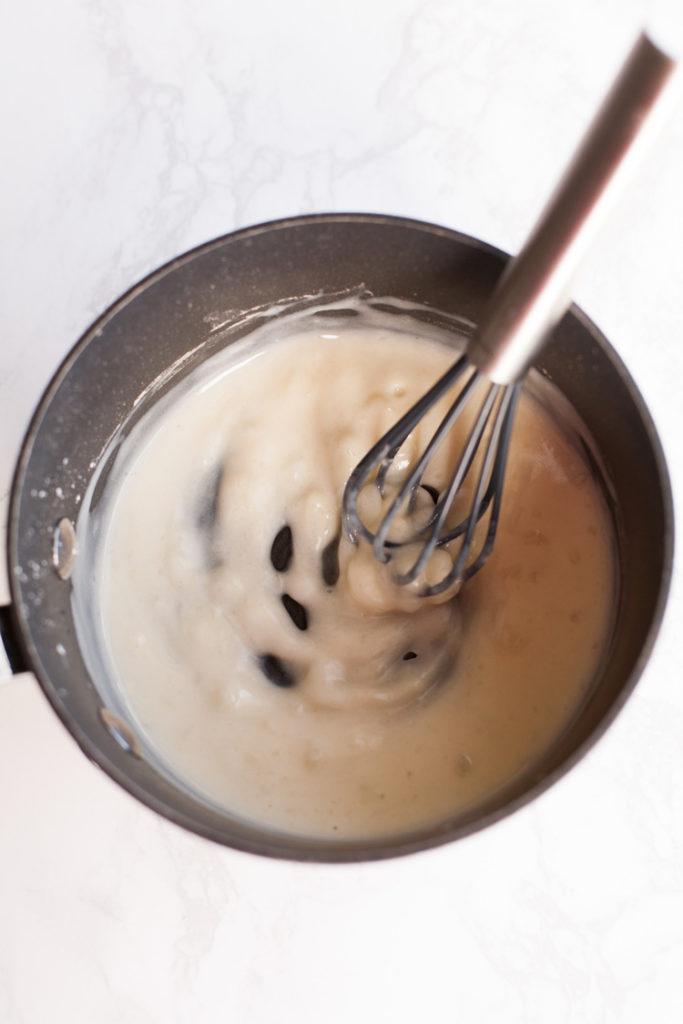
You know the tangzhong is ready when your whisk leaves lines in the bottom of the pan.
Next you’ll heat 1/4 cup of whole milk to about 110 degrees F. (Just pop it in the microwave for 10-15 seconds until it is lukewarm). Sprinkle with 1 1/2 teaspoons of active, dry yeast. Set the milk and yeast aside for about ten minutes, until the yeast is frothy.
Now your tangzhong should be cool enough to be mixed with other ingredients. (It’s o.k. if it’s still a little warm). Add one egg and whisk in. Then add 1/4 cup of heavy whipping cream and mix in.
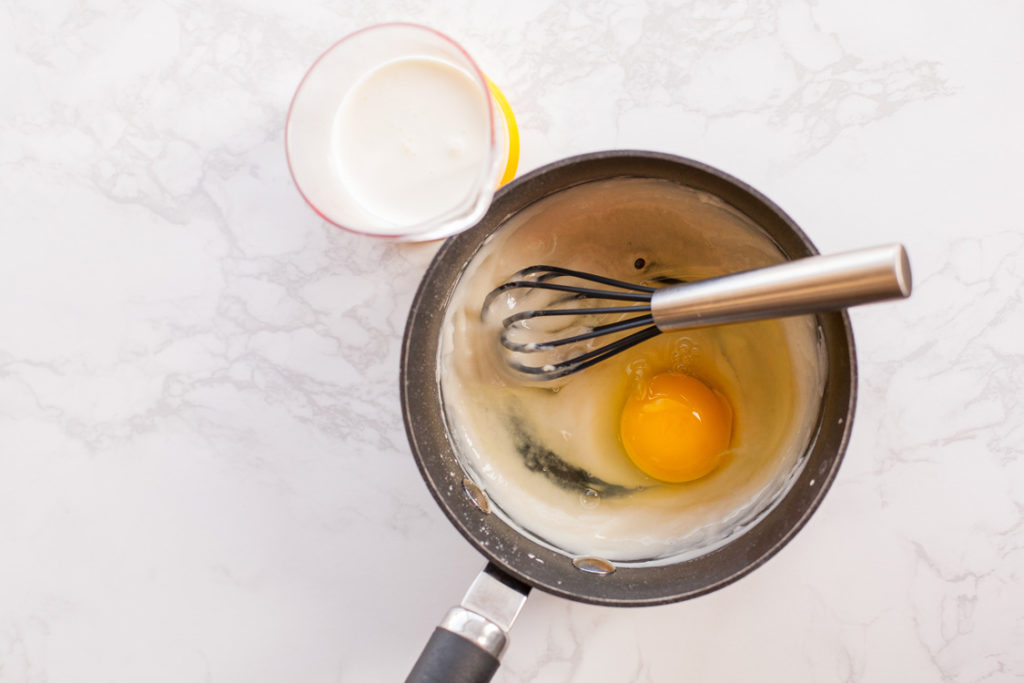
Add egg and cream to the tangzhong.
Set that aside for a minute while you get your stand mixer fitted with a dough hook. Now add to your mixer all your dry ingredients:
3 tablespoons of sugar, 3/4 teaspoon of salt, and 2 1/2 cups of bread flour. You can use a spoon to stir that a little if you like.
Then pour in your tangzhong/egg/cream mixture and your milk/yeast mixture. Turn your mixer on to speed one or two and let the dough hook do its work. You may need to stop from time to time and use a spatula to scrape down the sides of the bowl. If you feel like the dough is too sticky, you can add up to an extra 1/4 cup of flour, a little at a time.
Finally, you’ll add two tablespoons of softened butter, one tablespoon at a time. Just drop one in there and let the dough hook knead the dough on low speed until the butter disappears. Then do the same with the second tablespoon.
At this point, the dough will be sticking to the bottom of the bowl, but when you touch it, it will be barely sticky. Now you can either leave the dough in the mixing bowl, or transfer it to another bowl to rise.
Cover it with plastic wrap or a clean kitchen towel and let it rise at room temperature or in a warm place until doubled in size.
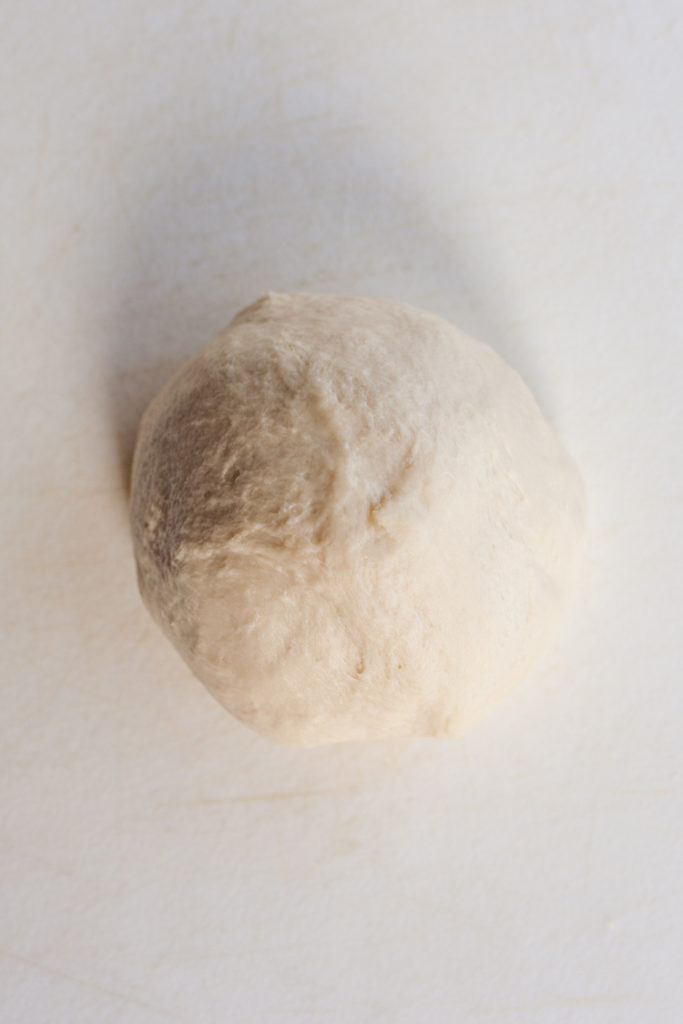
Japanese Milk Bread dough before rising.
Now I have a trick for getting this to rise more quickly. You might already know this trick, but I’m still telling you, just in case 🙂 Heat your oven to 200 degrees F, and then turn it off. Put your dough in a metal or glass bowl (I just leave it in the mixer bowl), cover it with a cloth, and put it in the warm oven for about an hour, until doubled in size. (Make sure you don’t put it into the oven with plastic wrap, or the plastic wrap will melt!)
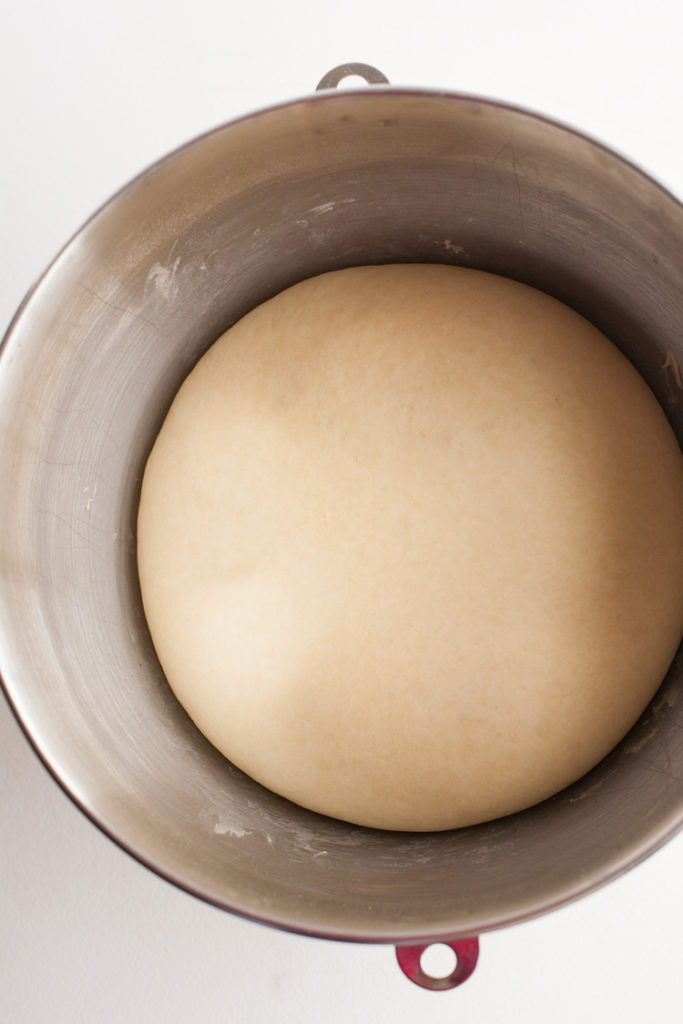
Japanese Milk Bread dough after rising.
After the dough has risen, punch it down, remove it from the bowl, and divide it into three equal pieces. (I actually weighed my pieces on a kitchen scale to make sure they were equal).

Divide the dough into three equal portions.
Now you’re going to use a rolling pin to roll out each piece on a floured work surface, like this:
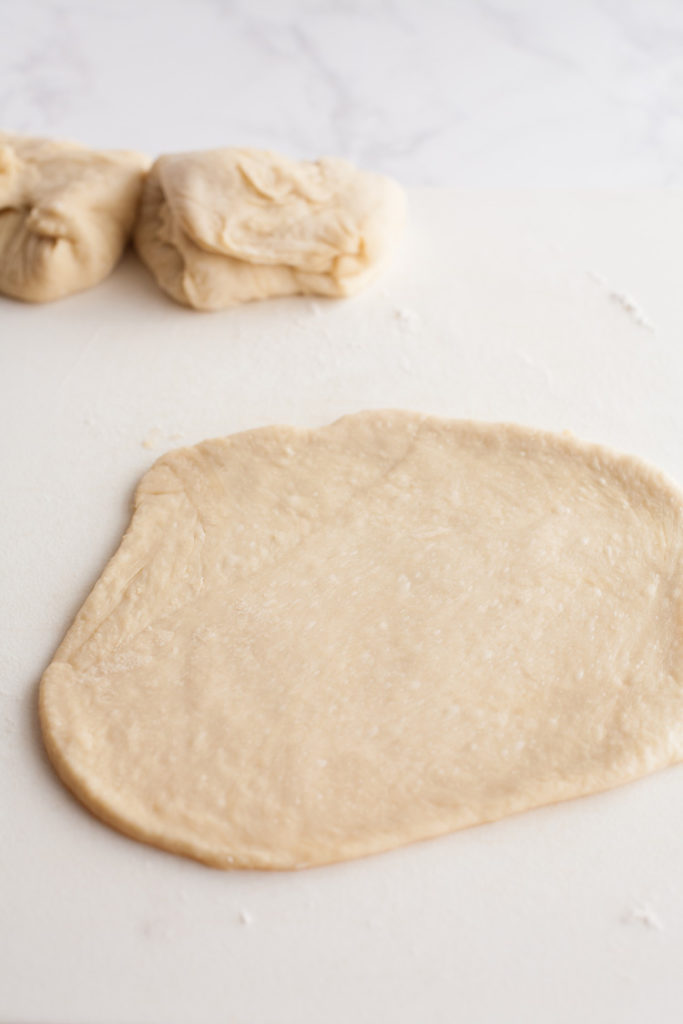
Roll out each piece of dough.
It’s o.k. if it isn’t in a perfect square. Now fold the dough in thirds, like this:
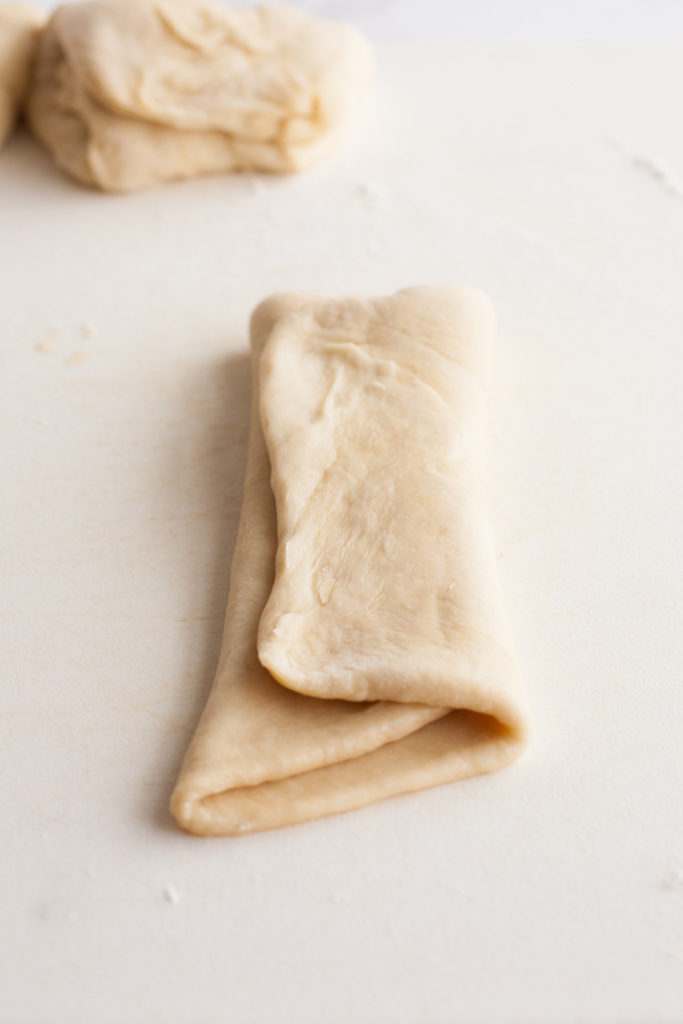
Fold the dough into thirds.
Now just roll it up from one end to the other.
Roll up the folded dough length-wise.
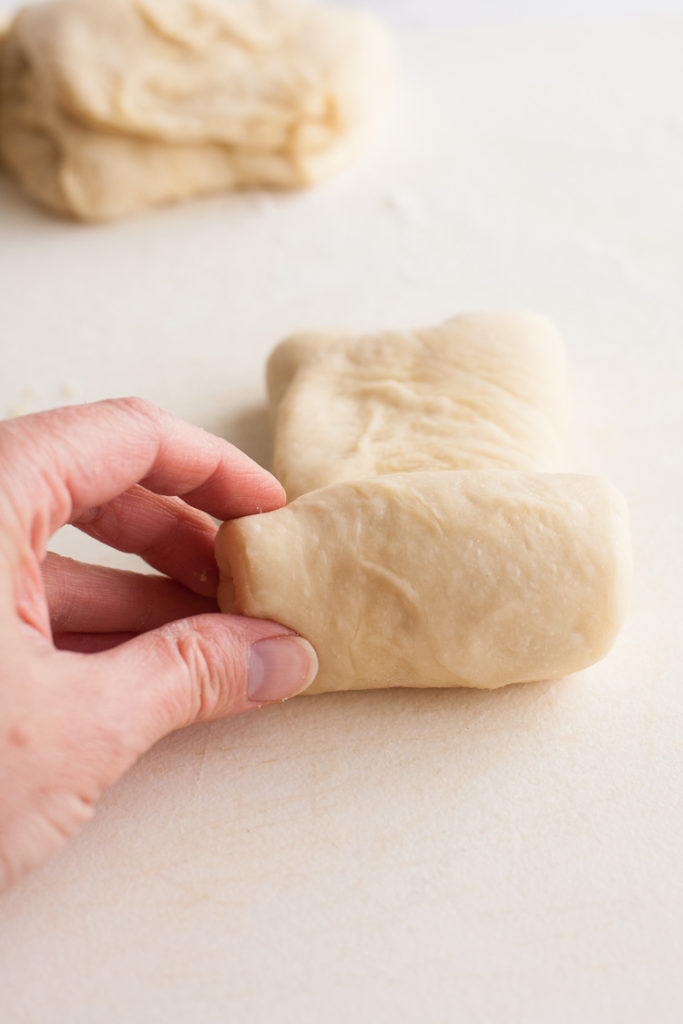
Do this for each of the pieces of dough.

Japanese Milk Bread dough rolled up.
Now put the dough into a greased and floured bread pan, with the seam side down.
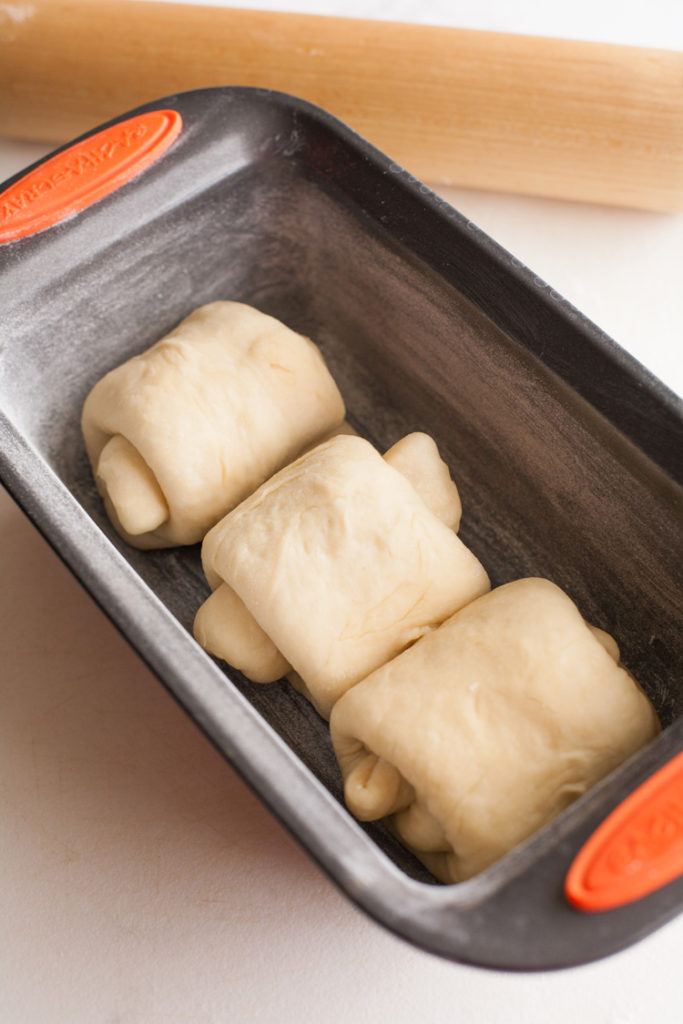
Line up the three portions of rolled dough in your greased, floured bread pan.
It’s time for the second rise. Once the dough is in the bread pans, you can cover it and leave it on the counter, or pop it back into a warm oven for about an hour. (Make sure it’s covered with a cloth if you put it in your warm oven so the top doesn’t dry out. If you cover it with plastic wrap and leave it on the counter, make sure the plastic wrap is loosely placed so that it doesn’t inhibit the dough from rising above the rim of the pan).
You’ll know it’s ready to bake when you poke it with your finger and the dough bounces back slowly, but you can still see the indentation of your finger.
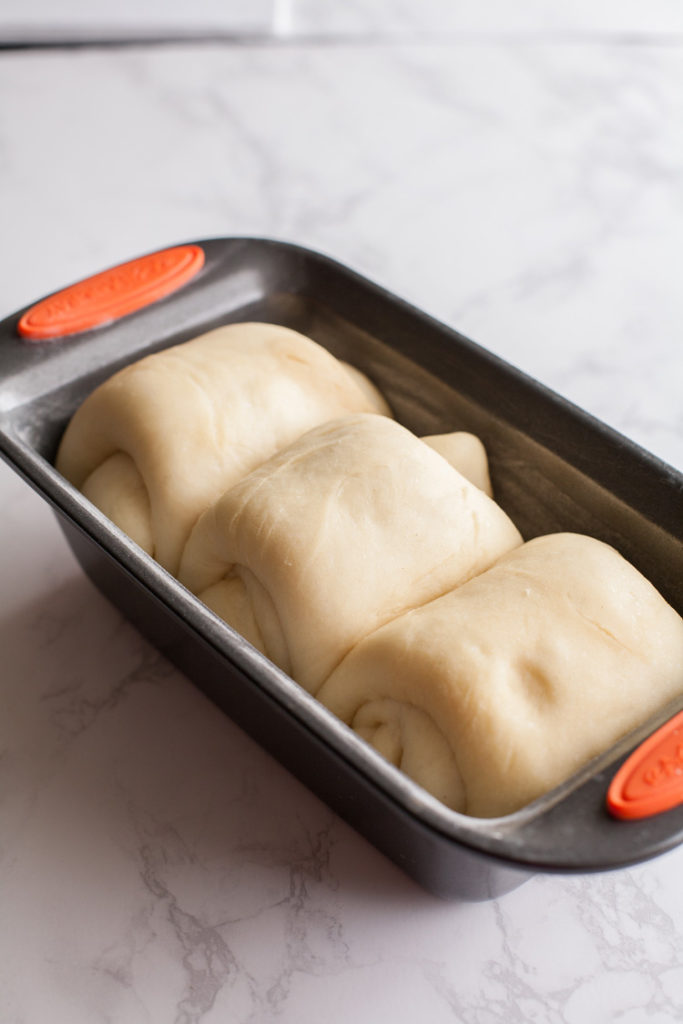
You’ll know your dough has risen enough when you press it with your finger and the dough bounces back, but the indentation remains.
Now we want this bread to be really pretty, so there’s one more thing we need to do before baking. In a small bowl, crack an egg and whisk it with a splash of milk or water. Then brush the egg wash gently over the top of the dough.

Brush the top of the dough with a mixture of whisked egg and milk or water.
It’s time to bake! Pop this in a 350-degree F. oven and bake for about 30 minutes, until golden brown on top. (If you feel your bread is getting too brown before time is up, just lay a piece of tin foil over the top for the last few minutes of baking).

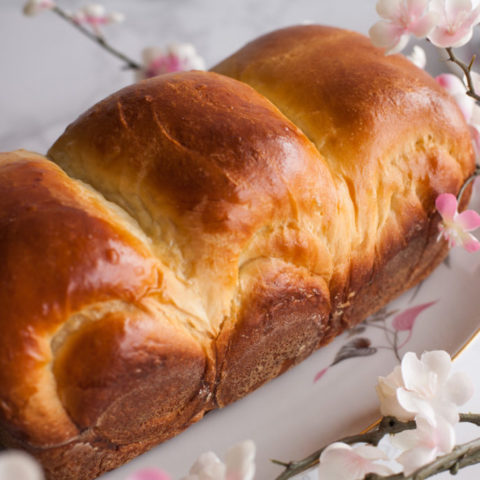
Japanese Milk Bread fresh out of the oven.
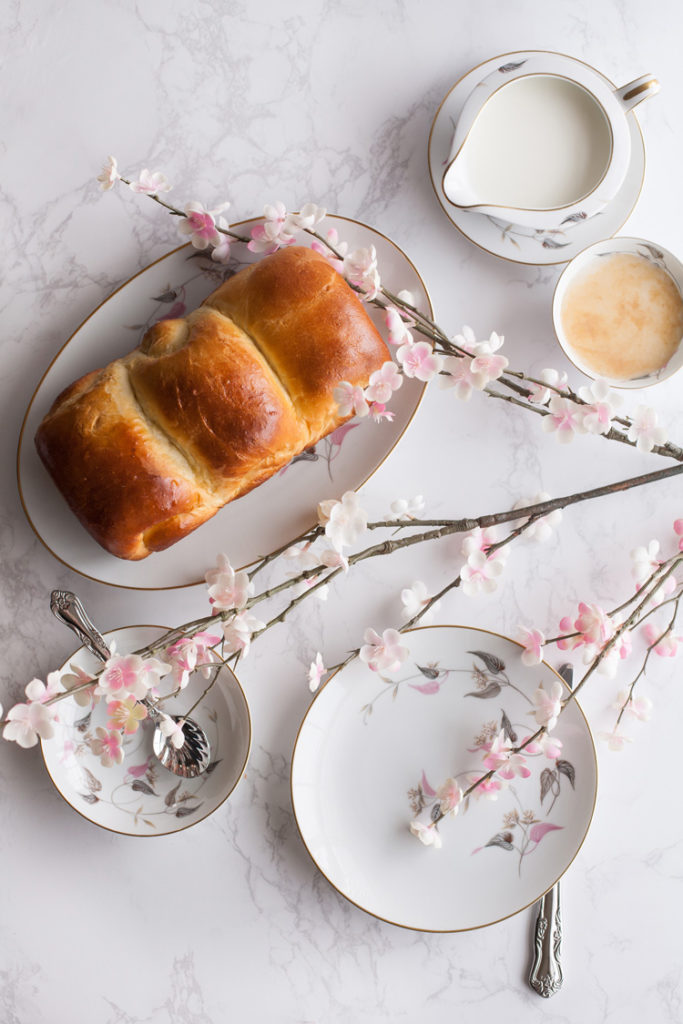
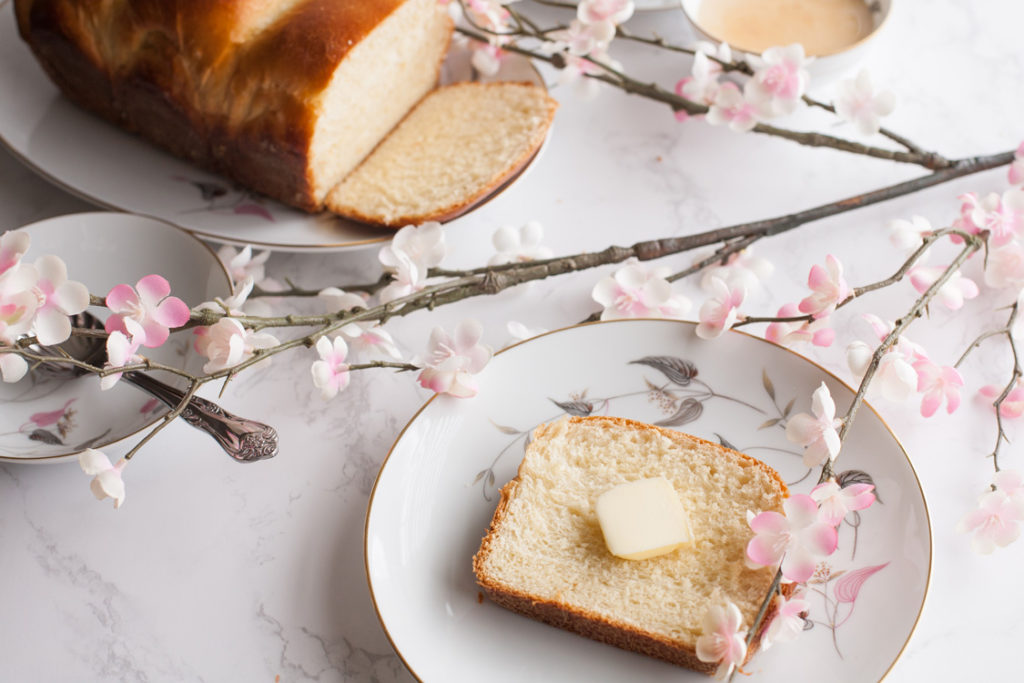
Isn’t it gorgeous? Just let the bread cool for a few minutes before turning it out of the pan onto a wire rack. Then slice and enjoy! (And oh boy, will you ever enjoy it!)
Japanese Milk Bread
For more amazing bread recipes, try my Overnight Yeast Rolls, Home Made Hamburger Buns, and Bread Bowls. You can find all my bread recipes in one convenient place by clicking here.
Recipe adapted from Hokkaido Milk Bread on Food52.
Do you have more questions about Japanese Milk Bread? Be sure to scroll past the recipe for the answers!
Today’s Freebie!
Japanese Milk Bread
Classic Japanese Milk Bread (Shokupan or Hokkaido Milk Bread). Follow this step-by-step tutorial from someone who has actually lived in Japan!
Ingredients
For the Tangzhong
- 6 tablespoons water
- 2 tablespoons flour
For the Rest of the Bread
- 1/4 cup whole milk
- 1 1/2 teaspoons active dry yeast
- 2 1/2 cups bread flour (or all-purpose flour)
- 3/4 teaspoon salt
- 3 tablespoons sugar
- 1/4 cup heavy whipping cream
- 2 eggs (one for the dough and one for the egg wash)
- 2 tablespoons butter, softened
- splash of milk or water (for the egg wash)
Instructions
- Put the six tablespoons of water and two tablespoons of flour in a small saucepan on the stove. Heat over medium-low heat, whisking constantly, until the mixture thickens and turns into a paste. As soon as you can drag the whisk across the bottom of the pan and a line remains, remove the mixture from the heat and let cool.
- Heat the 1/4 cup of whole milk to lukewarm (10-15 seconds in the microwave) and sprinkle with the yeast. Set aside to let the yeast proof. It should get bubbly and frothy after 5-10 minutes.
- In the meantime, add one egg to the flour paste (tangzhong) and whisk it in thoroughly. Then add the 1/4 cup of heavy whipping cream and mix well.
- In the large mixing bowl of your stand mixer, add 2 1/2 cups of bread flour, 3/4 teaspoons of salt, and 3 tablespoons of sugar. Fit your stand mixer with the dough hook.
- Pour the tangzhong/egg/cream mixture in the mixer with the flour, sugar and salt. Add the milk and yeast, and then turn your mixer on to low speed (1 or 2). Let the dough hook mix the dough, stopping if necessary to scrape down the sides with a spatula.
- Knead with the dough hook for 4-5 minutes. If you feel the dough is too sticky, you may add up to 1/4 cup of flour.
- Add one tablespoon of softened butter to the dough and knead until it is fully incorporated. Then add the second tablespoon and do the same. When the dough is done, it should still stick to the bottom of the bowl, but when you press on it with your finger, it should be barely sticky.
- Remove the bowl from the stand mixer, cover the top with a towel or plastic wrap (only if not using the oven to proof) and allow the dough to rise in a warm place until doubled in size.
- Once the dough has doubled in size, punch down and divide into three equal pieces.
- Roll each piece out on a floured surface. Fold the dough in thirds, and then roll it up like a cinnamon roll. Place in a greased, floured bread pan. Repeat with the other two pieces of dough.
- Loosely cover the bread pan with a cloth or plastic wrap and let rise until doubled.
- When ready to bake, preheat your oven to 350 degrees F. Mix the second egg with a splash of water or milk and gently brush on top of the risen bread dough.
- Bake for 30 minutes, until golden brown. If you feel the top is getting too brown, you can cover it with a piece of aluminum foil for the last few minutes of baking.
- Let cool in the pan for at least ten minutes before turning out to cool completely.
How do you eat Japanese Milk Bread?
In Japan, this bread is sliced into thick slices and used as sandwich bread, or for toast. My favorite way to eat it when I lived in Japan was with some butter and orange marmalade!
Why is it called Milk Bread?
Along with its obvious ingredients of milk and cream, sometimes the tangzhong is made with milk rather than water.
Is Shokupan the same as Milk Bread?
Yes. Yes it is. “Shoku” means “food” in Japanese, and “pan” means “bread.”
(You may recognize that the word “pan” is used for bread in several other languages, such as Spanish and Portuguese. It’s a foreign word that made its way into the Japanese language).
Pin me!
I love how fluffy this bread is! Looks so airy and delicious!
These are so pretty and add such a nice touch to a meal!
This looks so good!!!!
I am putting this bread on my must try list!! It looks sooooo fluffy!!
Easy to do and simply delicious!!
Thank you for sharing.
Looks beautiful. I’d like to make more than one loaf at s time. I have a Bosch mixer that can handle multiple loaves. Does this recipe double or triple well? Thanks!
Marj, yes, you can double or triple this recipe! And you’ll be glad you did, because the bread disappears so fast!
This bread looks so amazing, and I must add, your presentation is beautiful!
I’ve never heard of this bread, but by the pictures I know I couldn’t stop with one loaf either!
Wonderful recipe. Bread is heavenly! I would suggest making just one loaf for the first time just to get the hang of it. Fun to try a new recipe that works out so well!
Thank you! I agree! It’s totally heavenly! I hear angels….
Just made it! So delicious! Thank you for a wonderful recipe. Japanese baked goods a so delicious and seriously underrated.
Anyway I could put some strawberry preserves or something in it to make it a little sweeter? I’m just curious because while over in Japan I got strawberry pan in a can and it was delicious.
I’m sure you could roll some up in there! That would be amazing!
É possível tão bom resultado sem batedeira, pois não tenho uma assim , só a manual. Obrigada!
You’re welcome! Thanks for your comment!
Looks lovely! My question is do you use salted or unsalted butter? Does it matter?
Hi Jennifer! I always use salted butter, but I don’t think it would matter in this recipe. Hope you love it!
Do you need to use whole milk? Or does soy/coconut milk work as well?
Also does wheat flour work instead of all purpose flour? It’s hard to find in store these days!
Hi KC. I have found with this recipe that you do need to use whole milk, and also cream if you want the bread to retain its tenderness past one day. If you plan on eating it right away, you can get away with using less fat in the dough. I have never tried it with soy milk or coconut milk. If I had a choice, I would use full-fat coconut milk. And whole wheat flour will not yield the same type of results in this bread, although now I’m intrigued to try it! If you make the bread, I’d love to hear about your modifications and how it turned out!
I love this recipe! This is my 2nd time baking it..
Thank you, Mandy! It’s my favorite bread recipe! SOOO yummy!