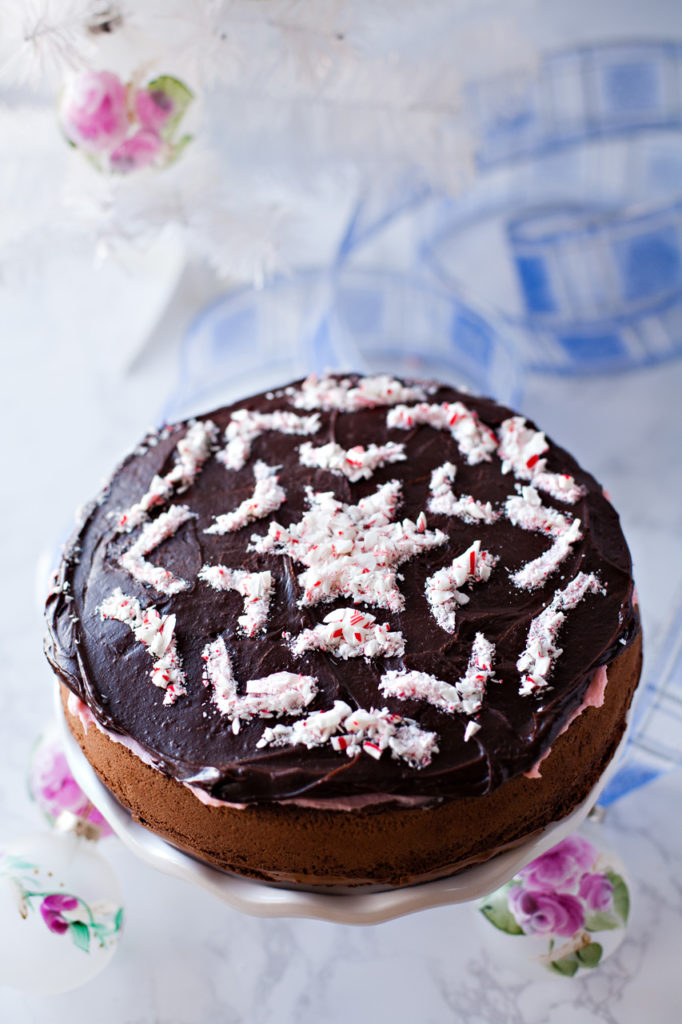
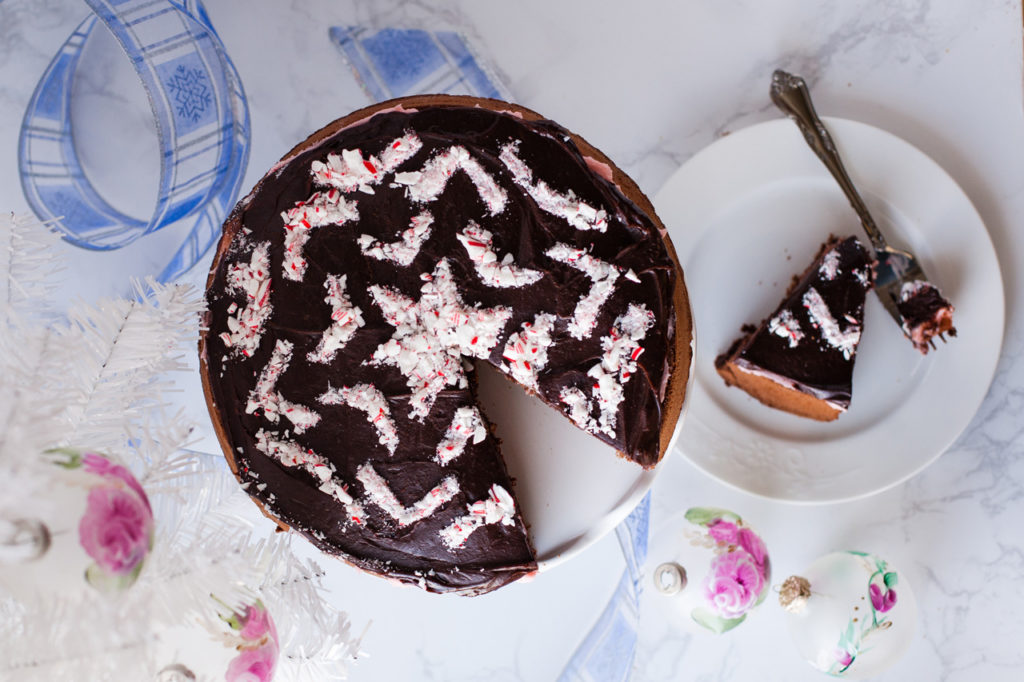
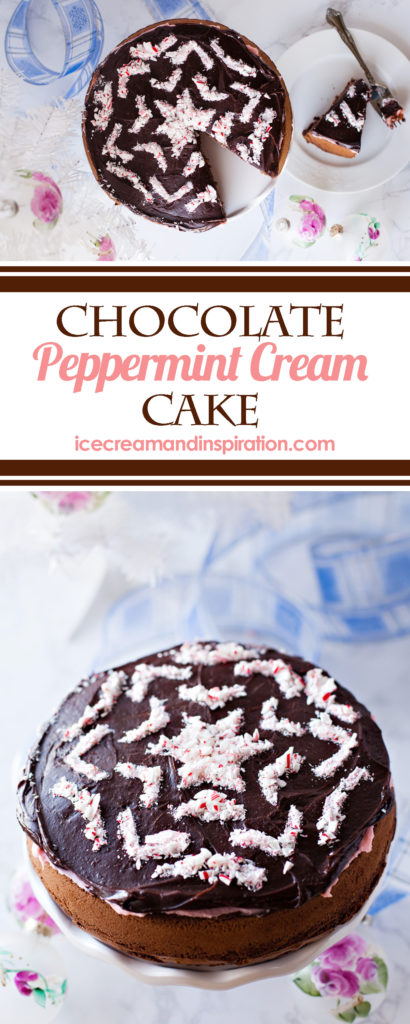
This show-stopping Chocolate Peppermint Cream Cake is the stuff of dreams! A thick, rich chocolate cake is topped with creamy peppermint and silky chocolate ganache. Take it over the top by decorating with a candy cane snowflake!
Watch out below!
It looked like a candy cane bomb had been dropped in my kitchen. Little, dangerous shards of pepperminty goodness covered my floor, my counter, and my table. Other small, pointy bits reached far-flung places where they still lay, yet to be discovered. If you have bare feet, beware! You may be impaled by your favorite Christmas candy!
How did my kitchen turn into a war zone? How did this candy cane assault happen? It was all because of this epic Chocolate Peppermint Cream Cake. And my apparent lack of skill when it comes to crushing candy canes. But don’t worry! I’ve learned a few things so that when YOU make this epic Chocolate Peppermint Cream Cake, your kitchen will not need to be surrounded by plastic cones and cordoned off with yellow “danger” tape.
Before we start, I need to tell you what you are in for here. The bottom layer is made of a thick, rich, moist brownie/cake. (A variation of these Decadent Chocolate Brownies, actually). The middle layer is a lovely pink, peppermint cream made with cream cheese, butter, and powdered sugar, along with peppermint flavor, of course. And the top layer? Chocolate ganache, my friends. It’s like heavenly, soft fudge that makes you sink back in your chair, close your eyes, and just savor every burst of flavor while you imagine you are in Paris, sitting beneath the Eiffel Tower instead of in your home, which does NOT feel like you’re on a European vacation. Unless you actually live in Europe, in which case, maybe it does!
Oh yeah–and there is the pretty peppermint snowflake design on top, which is what caused the big hullabaloo in my kitchen. I’m going to show you how to make that, too (although it’s actually completely optional).
Ready to get started? Let’s go!
First you are going to make your cake layer. You’ll use a single round cake pan, greased and parchmented (is that a word?) so that the cake doesn’t stick. If you don’t know about the awesome parchment-paper-in-the-bottom-of-the-cake-pan trick, you can see it explained and demonstrated here on this post for Chocolate Pumpkin Marble Cake.
As your cake is baking, the sides may raise above the edge of the pan. That’s o.k. But once the cake cools, you might want to cut those high sides off and level your cake a little. This is because you’re going to turn it upside down (so you can have a perfectly smooth top) and you don’t want the middle to sink. This is what your naked cake will look like when it is flipped over and put on a cake stand:
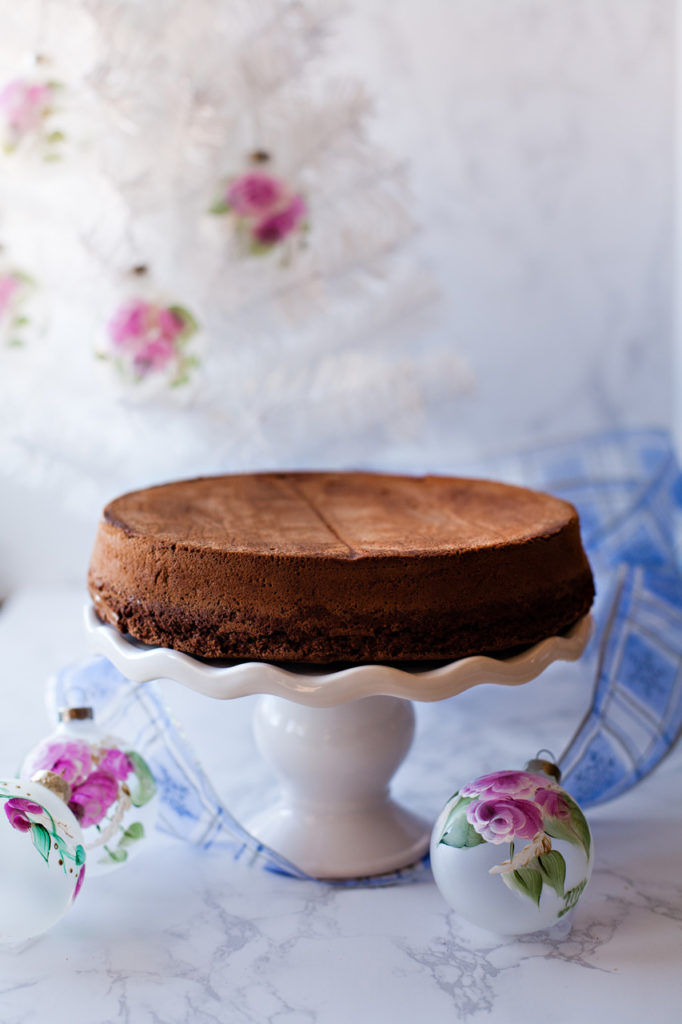
Kind of gorgeous, right? But we’re just getting started! Next you are going to add your pretty pink peppermint layer. You can make this layer as pink and as pepperminty as you want! I used two drops of red food coloring to get that lovely rosy hue. For the flavor, start with 1 tsp. of peppermint extract and then taste it to see if it’s strong enough for you. If not, feel free to add another 1/2 to 1 tsp. of extract. This layer is kind of thin, so don’t be afraid to go for the gusto with the peppermint! (I actually used peppermint essential oil. If you do this, add about 10 drops–not a whole teaspoon! And make sure that your essential oil is approved for internal use!)
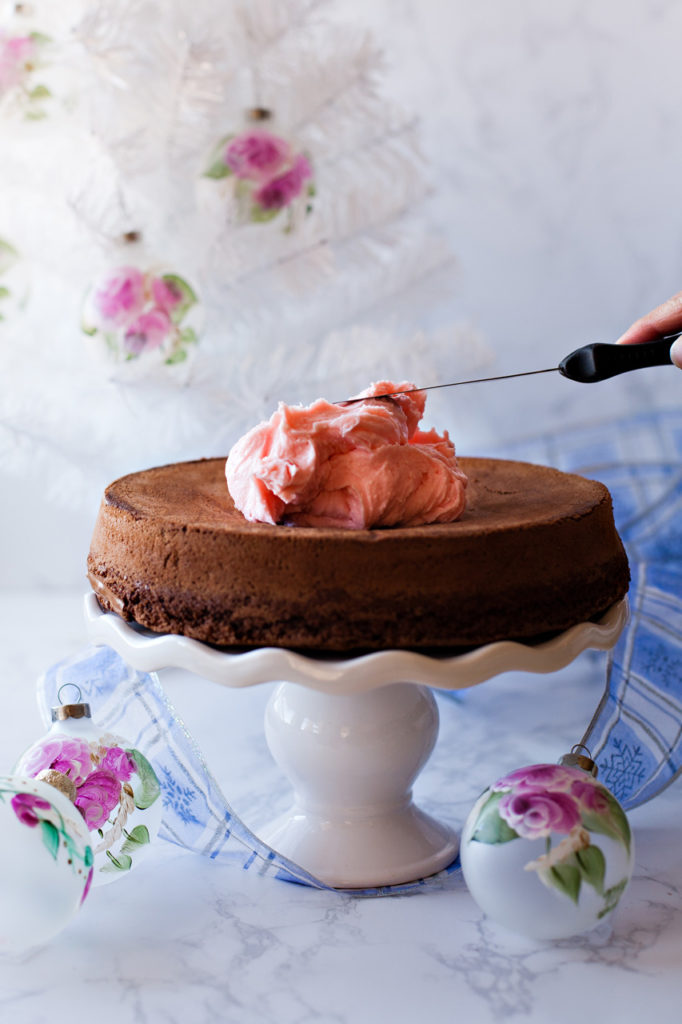
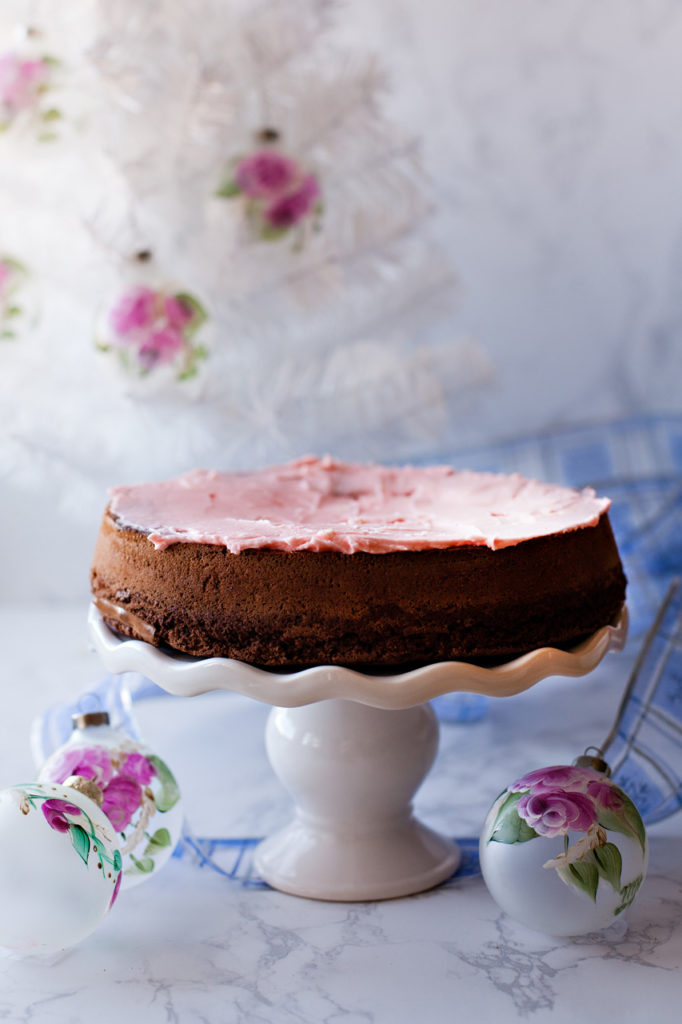
Just spread it around evenly to the edges of the cake. Pop your cake into the fridge for about 30 minutes while you go onto the next step.
Now you’re going to make your chocolate ganache for the top. I know it sounds fancy, but it’s super easy to make and only has two ingredients: heavy whipping cream and chocolate chips. You just heat the cream to almost boiling (until there are little bubbles popping around the edges of the pan), then remove it from the heat, add chocolate chips, and let them sit and melt for five minutes. Then you gently and slowly stir the chocolate chips and cream until everything is smooth and silky. You’ll want to cool the ganache for about 30 minutes so you can easily spread it on your cake. However, you can also cool it for less time and just pour it on top of your cake and let it drip down the sides. It’s really pretty, but only if you are using a big enough cake stand or plate so that the chocolate doesn’t fall off onto the table. Because that is not pretty.
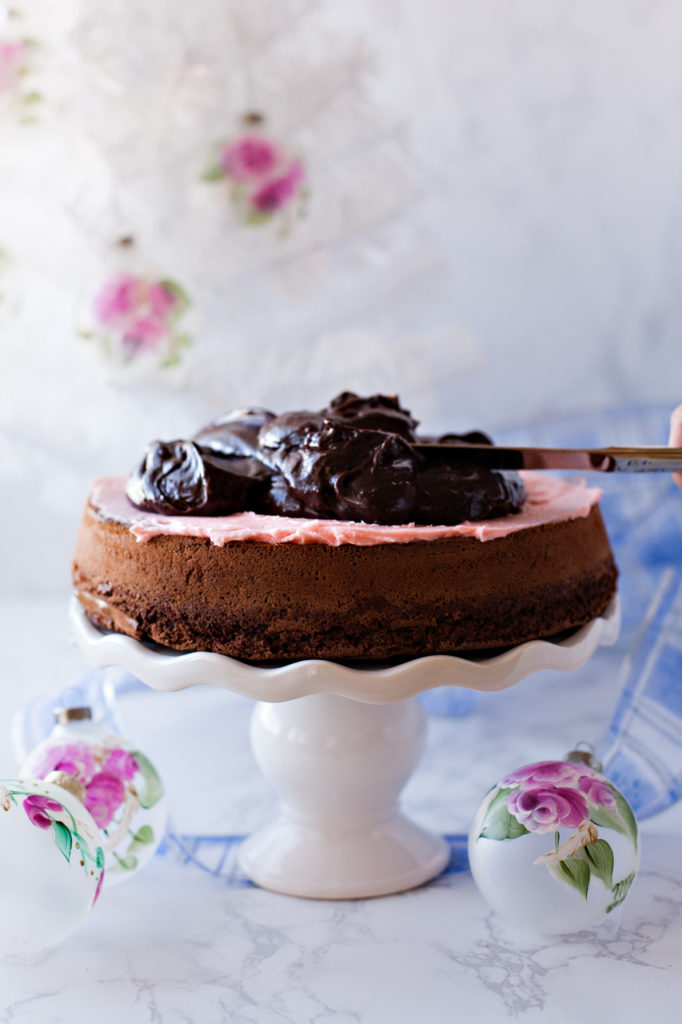
I realize this looks like a lot of ganache. That’s because it IS a lot of ganache! There is certainly enough here if you would like to frost the sides of your cake, but I decided to just do a thick layer on top.
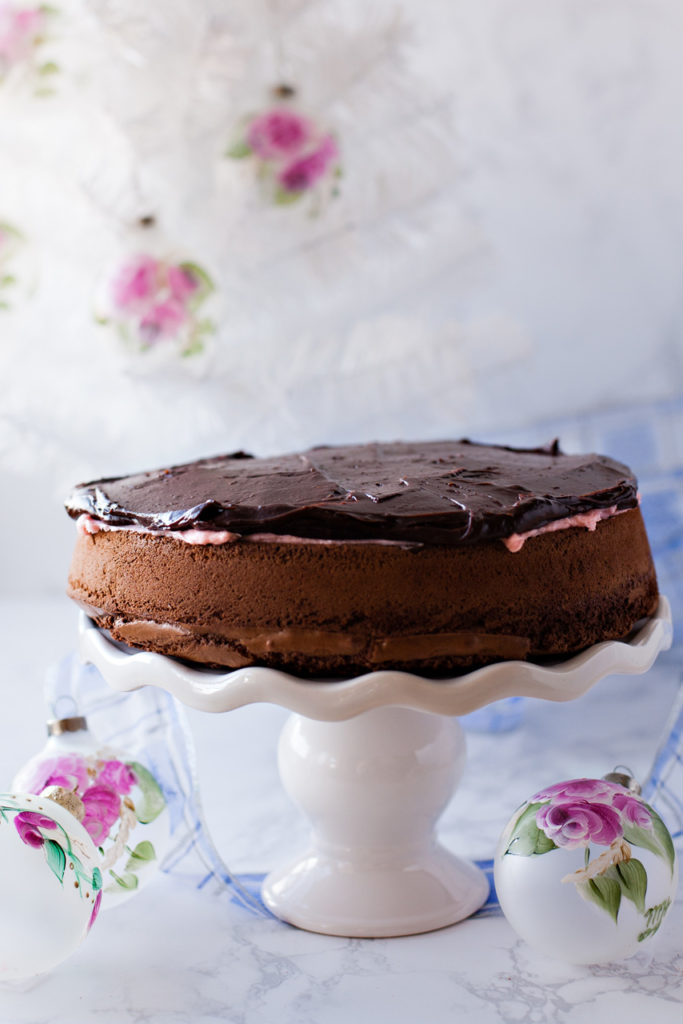
At this point, you can just chill your cake and be done! Or, you can drop some crushed candy canes on top. OR, you can do a fancy candy cane snowflake!
Let me show you how. (Pop the cake in the fridge to chill while you are getting ready). First, you’ll need to chop or crush your candy canes. Through much experimentation, I can tell you that the best way to do this is to use a food processor or blender. Drop about six full-sized candy canes into the food processor or blender and pulse them a few times (between 5 and 10) until you get the consistency you want.
The second-best way to crush candy canes is to put them inside a FREEZER-grade plastic bag! Don’t just use a sandwich bag, or your broken candy canes will just chew through the plastic and make a big mess. Close the bag, squeezing out as much air as you can, and then hit it with a rolling pin or hammer. Some people even like to double-bag their candy canes, or cover the bag with a kitchen cloth while they are hammering. I will tell you that trying to gently cut the candy canes with a large knife on a cutting board is a recipe for a peppermint minefield on your kitchen floor. Don’t do that 🙂
To create your snowflake shape, you’ll need to cut a snowflake out of waxed paper. First, use your cake pan to trace a circle on the waxed paper and cut it out. Fold the circle in half, then in half again.
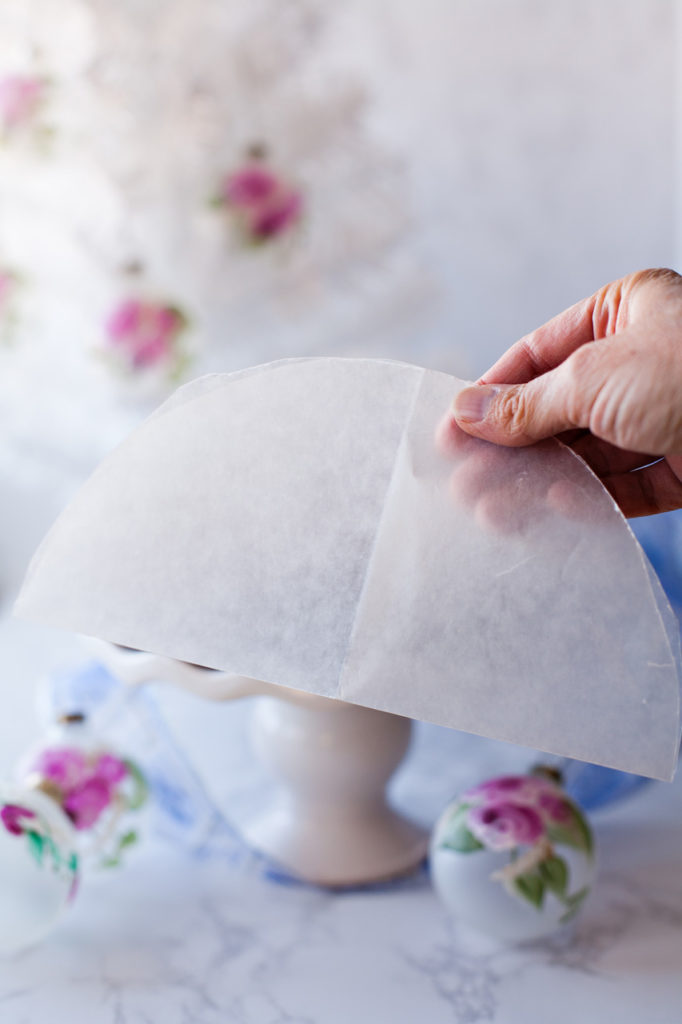
Once you have it folded in quarters, fold that into thirds so that it is in the shape of an ice cream cone.
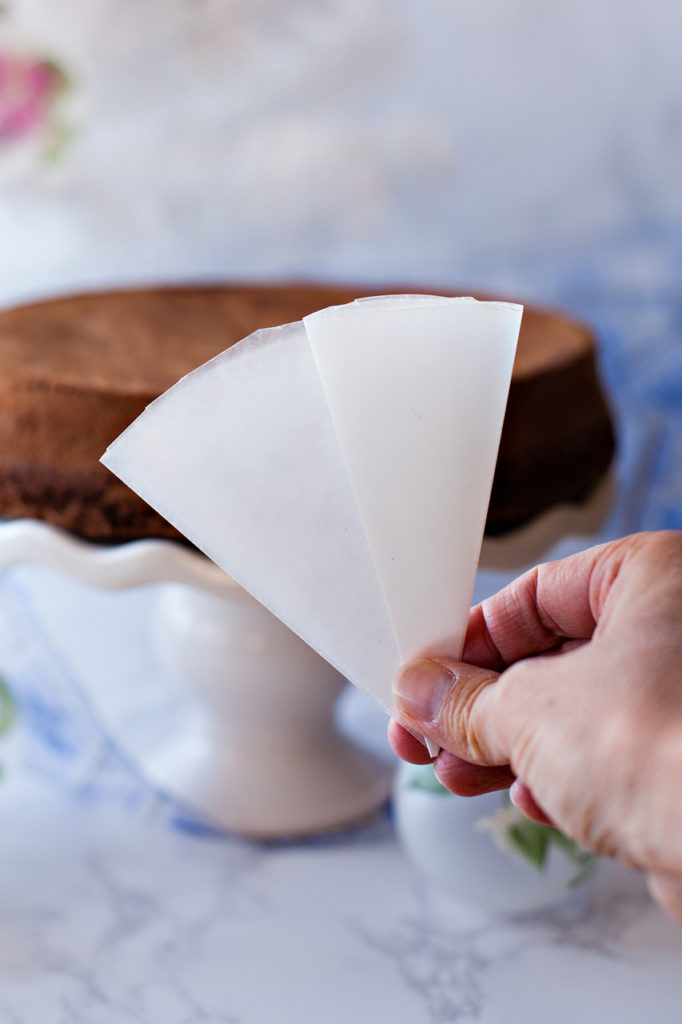

Now cut the bottom tip at an angle. This will create your star center.
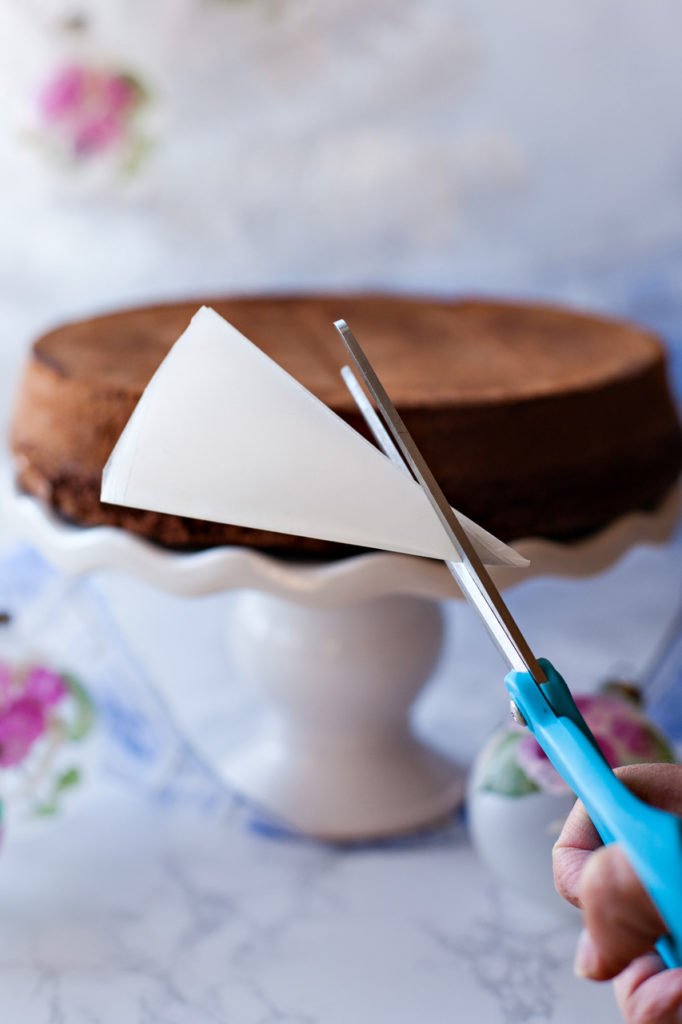
Continue cutting along the sides whichever shapes you want. Then unfold your snowflake.

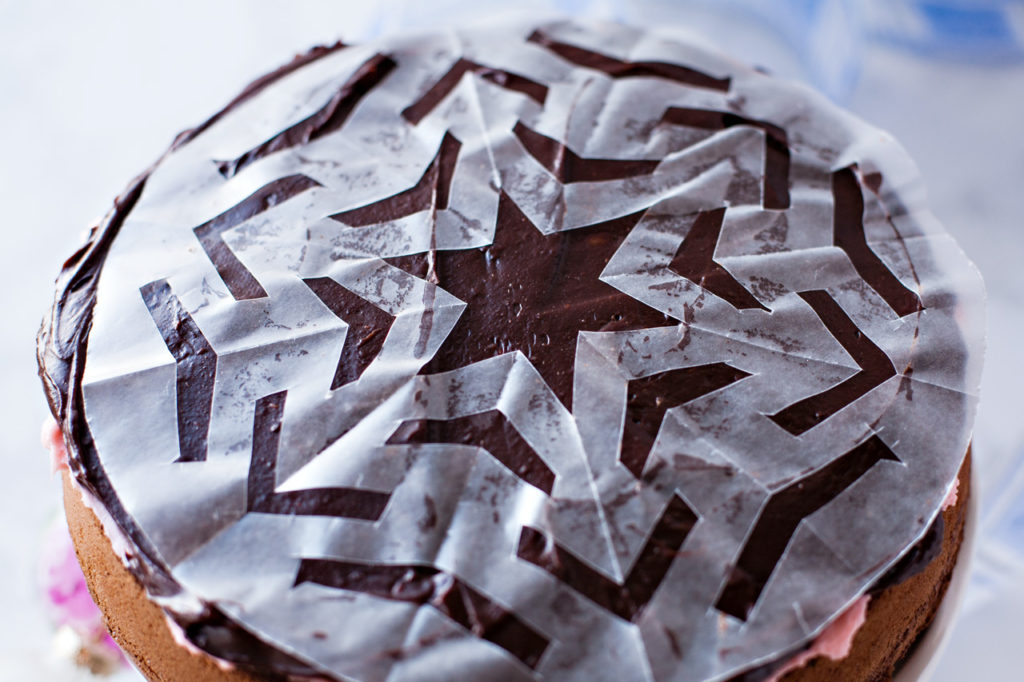
Now your cake should have chilled for about 45 minutes to an hour. You need to make sure that the ganache is pretty set. Touch it gently to make sure it doesn’t stick to your fingers.
Gently lay the snowflake on top of the ganache and smooth it down the best you can.
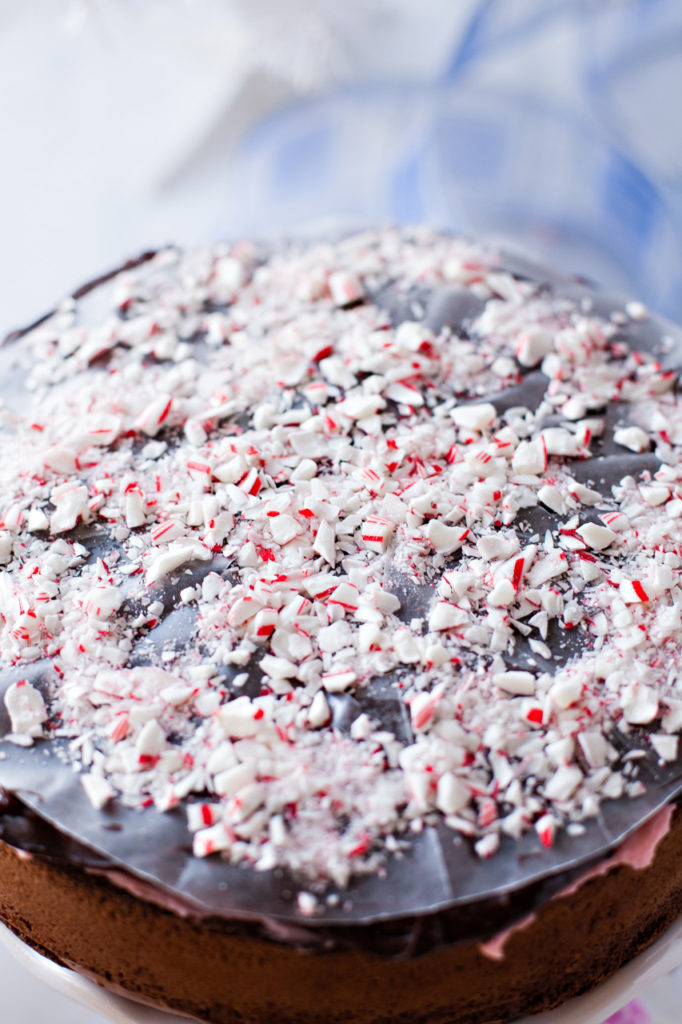
Then place your crushed candy canes over the top and gently press them into the open spaces.
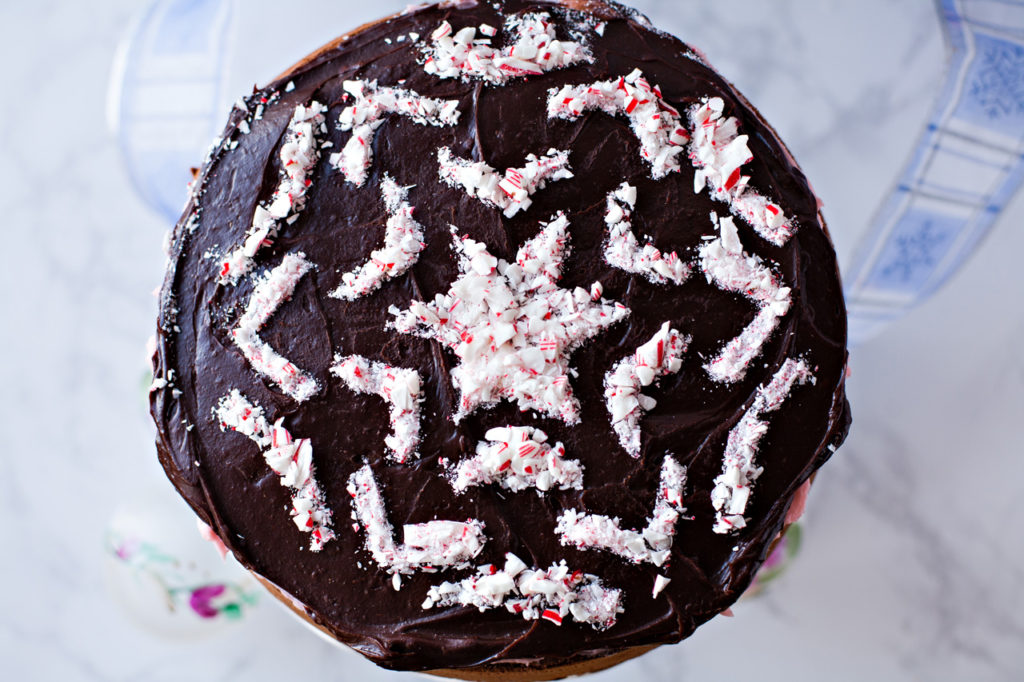
Now slowly peel the waxed paper snowflake off, and voila! Showstopping Chocolate Peppermint Cream Cake!
Refrigerate until ready to serve (it is fine if you refrigerate it uncovered). This cake is SUPER rich and will easily serve 16 people. Now, can somebody tell me if they sell pre-crushed candy canes at the store?
P.S. You can get my FREE Favorite Cookies Cookbook, just in time for the holiday baking season! Click here to get your copy!
This recipe first appeared on I Heart Naptime.

- 1 1/2 cups semi-sweet chocolate chips
- 1/2 cup butter
- 3 large eggs
- 1 cup granulated sugar
- 1 1/2 teaspoons pure vanilla extract
- 1 cup flour
- 1/2 teaspoon baking powder
- 1/2 teaspoon salt
- 1/4 cup unsalted butter, room temperature
- 3/4 cup cream cheese, room temperature
- 3/4 cup powdered sugar
- 1 teaspoon peppermint extract (or more to taste)
- 2 drops red food coloring
- 1 cup heavy whipping cream
- 2 cups semi-sweet chocolate chips
Melt the butter and chocolate chips together over low heat in a pan on the stove. Stir until smooth and no lumps remain. Remove from heat and let cool slightly.
In a large mixing bowl, mix the eggs and sugar together until well incorporated. Add the vanilla and mix.
Add the cooled chocolate/butter mixture (it's o.k. if it's still slightly warm) and mix with the egg/sugar mixture until well blended.
Add the flour, baking powder, and salt. Mix well.
Pour into a well-greased 9-inch round cake pan. (I highly suggest greasing the pan, then adding parchment paper and greasing that as well).
Bake at 350 degrees F. For 30 minutes, until a toothpick in the center comes out clean. Cool on a wire rack for five minutes. Run a knife around the edge to loosen the cake and then cool for an additional ten minutes.
Invert the cake onto a cake stand or serving platter and cool completely. (Remove the parchment paper if it is stuck to the cake).
Beat the butter and cream cheese together until combined.
Gradually beat in the powdered sugar.
Add the peppermint extract and food coloring and beat until well blended.
Spread on top of cooled cake and refrigerate for 30 minutes.
Heat the cream in a medium-sized pan on the stove over medium-high heat to almost boiling. Remove from heat.
Carefully pour in the chocolate chips, making sure that all of them are covered by the cream. Let sit for five minutes so the hot cream will melt the chocolate chips. Then stir until smooth and glossy.
Refrigerate for 30 minutes or more, until spreadable. Spread over the top (and sides, if desired) of cake.
Refrigerate until ready to serve, or sprinkle with crushed candy canes and then refrigerate.
Note: If making a decorative snowflake design with candy canes, chill the cake for 45 minutes or longer to give the ganache time to set up.
Pin me!

YUM! This cake looks just perfect! I love the decoration stencil – so easy and so beautiful ♥
Does this require sharing the cake with others? Peppermint is the best!
Hey, crushing candy canes isn’t an easy job! Goodness knows I always have shards all over my kitchen, too, when I work with it. 😉 Also, this cake looks absolutely INCREDIBLE! I wish I had a slice of it right now!
I am making this, and eating the entire thing myself… Ok MAYBE i will share with my family!! Can you say DELICIOUS!!!! YUM!!
This cake is so beautiful and so worth the candy cane bomb!